Sales Templates
You need to make a decent list of all your tailoring products and their descriptions. By having it ready, you can achieve more sales targets.
Go to Setup then Tailoring Setup and then Sales Templates.
Click on Add New Template, or if any templates are pre-created, click ‘Actions‘ to create new templates.
- Basic Information
Enter all the basic points about the tailoring product in this section.
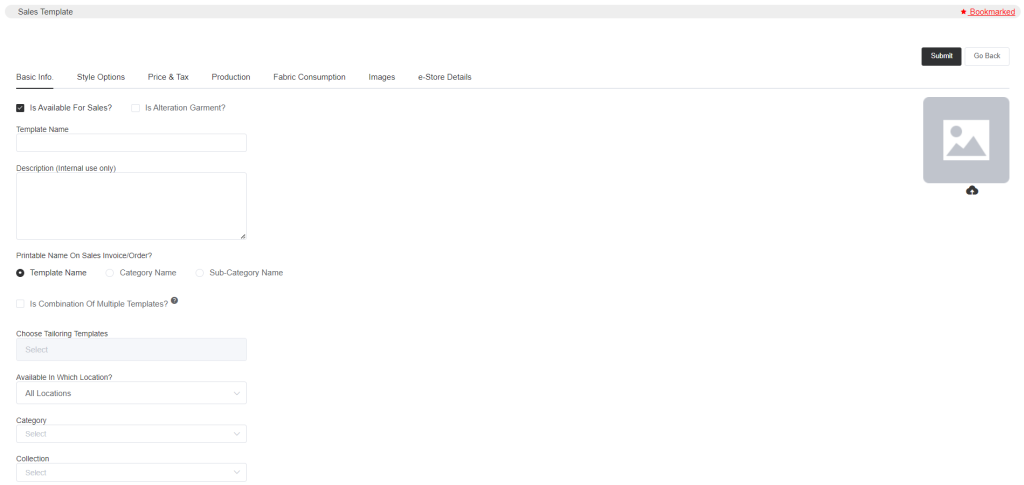
- The option Is Available For Sales defines whether the item is available for sale. Is Alteration Garment option specifically for alteration-eligible garments. You can select the option if you want to create alteration garment templates.
- If you have an order for alteration, you can select the option ‘Is Alteration Garment’ and add a template name, i.e., Alteration Pants. Then add all the details and submit. And for all the alteration garments, you need to create individual templates. Next, whenever you receive an order for an alteration, search the template and add it to the order.
- Remember that while creating orders, if you want to add fabric for any alteration garment then you will need to uncheck the option: Is Alteration Garment.
- In Template Name, you can set the name of the garment you stitch. This template name will be displayed in the list at the time of sale. Then you must select the item and add it to the order.
- In the Description, you can enter notes for your team members’ understanding.
- ‘Printable Names On Sales Invoice/Order‘ is the name that you want to print on the sales invoice or order. You need to select whether you want to print the template name, category name, or sub-category name.
- Remember that at first, you need to create single templates which means single items i.e. shirts, trousers, jackets, kurtas(Indian wear), vests, etc.
- Then you create Combination Items i.e. 2pc Suits, 3pc Suits and all other combination items you stitch.
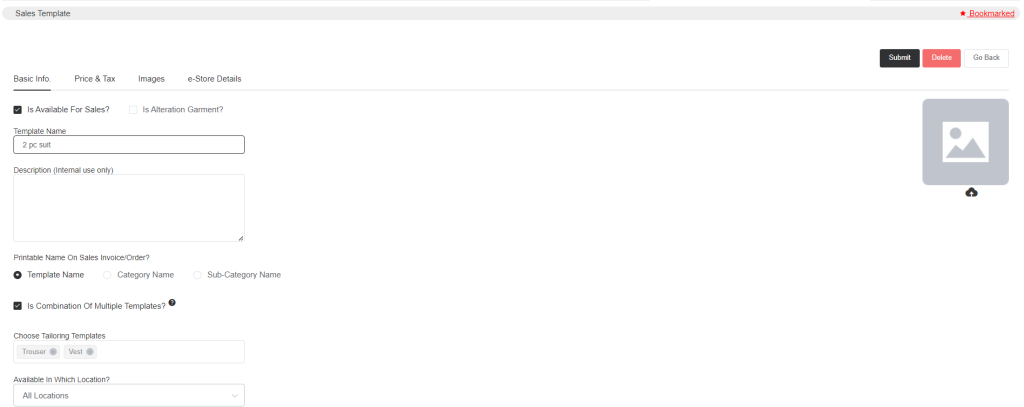
While creating combination items select the option Is Combination Of Multiple Templates. Then you will be asked to choose the single tailoring templates that will be added to the combination items. Add details like price and tax, and images for the combination items.
- Select the location. Also, select the category and sub-category (that you created before) and select ‘collection’ (‘collection’ is optional though).
- Style Options
You can set all the styling options for your garments.

You can specify all the styles of a particular garment. Select if it is an accessory or not. You can also sort the styles using the upward and downward arrow keys. You can see the Options column which means if any particular style has multiple different style options then you can click on the Option and add new style details or any extra charge details for the styles.
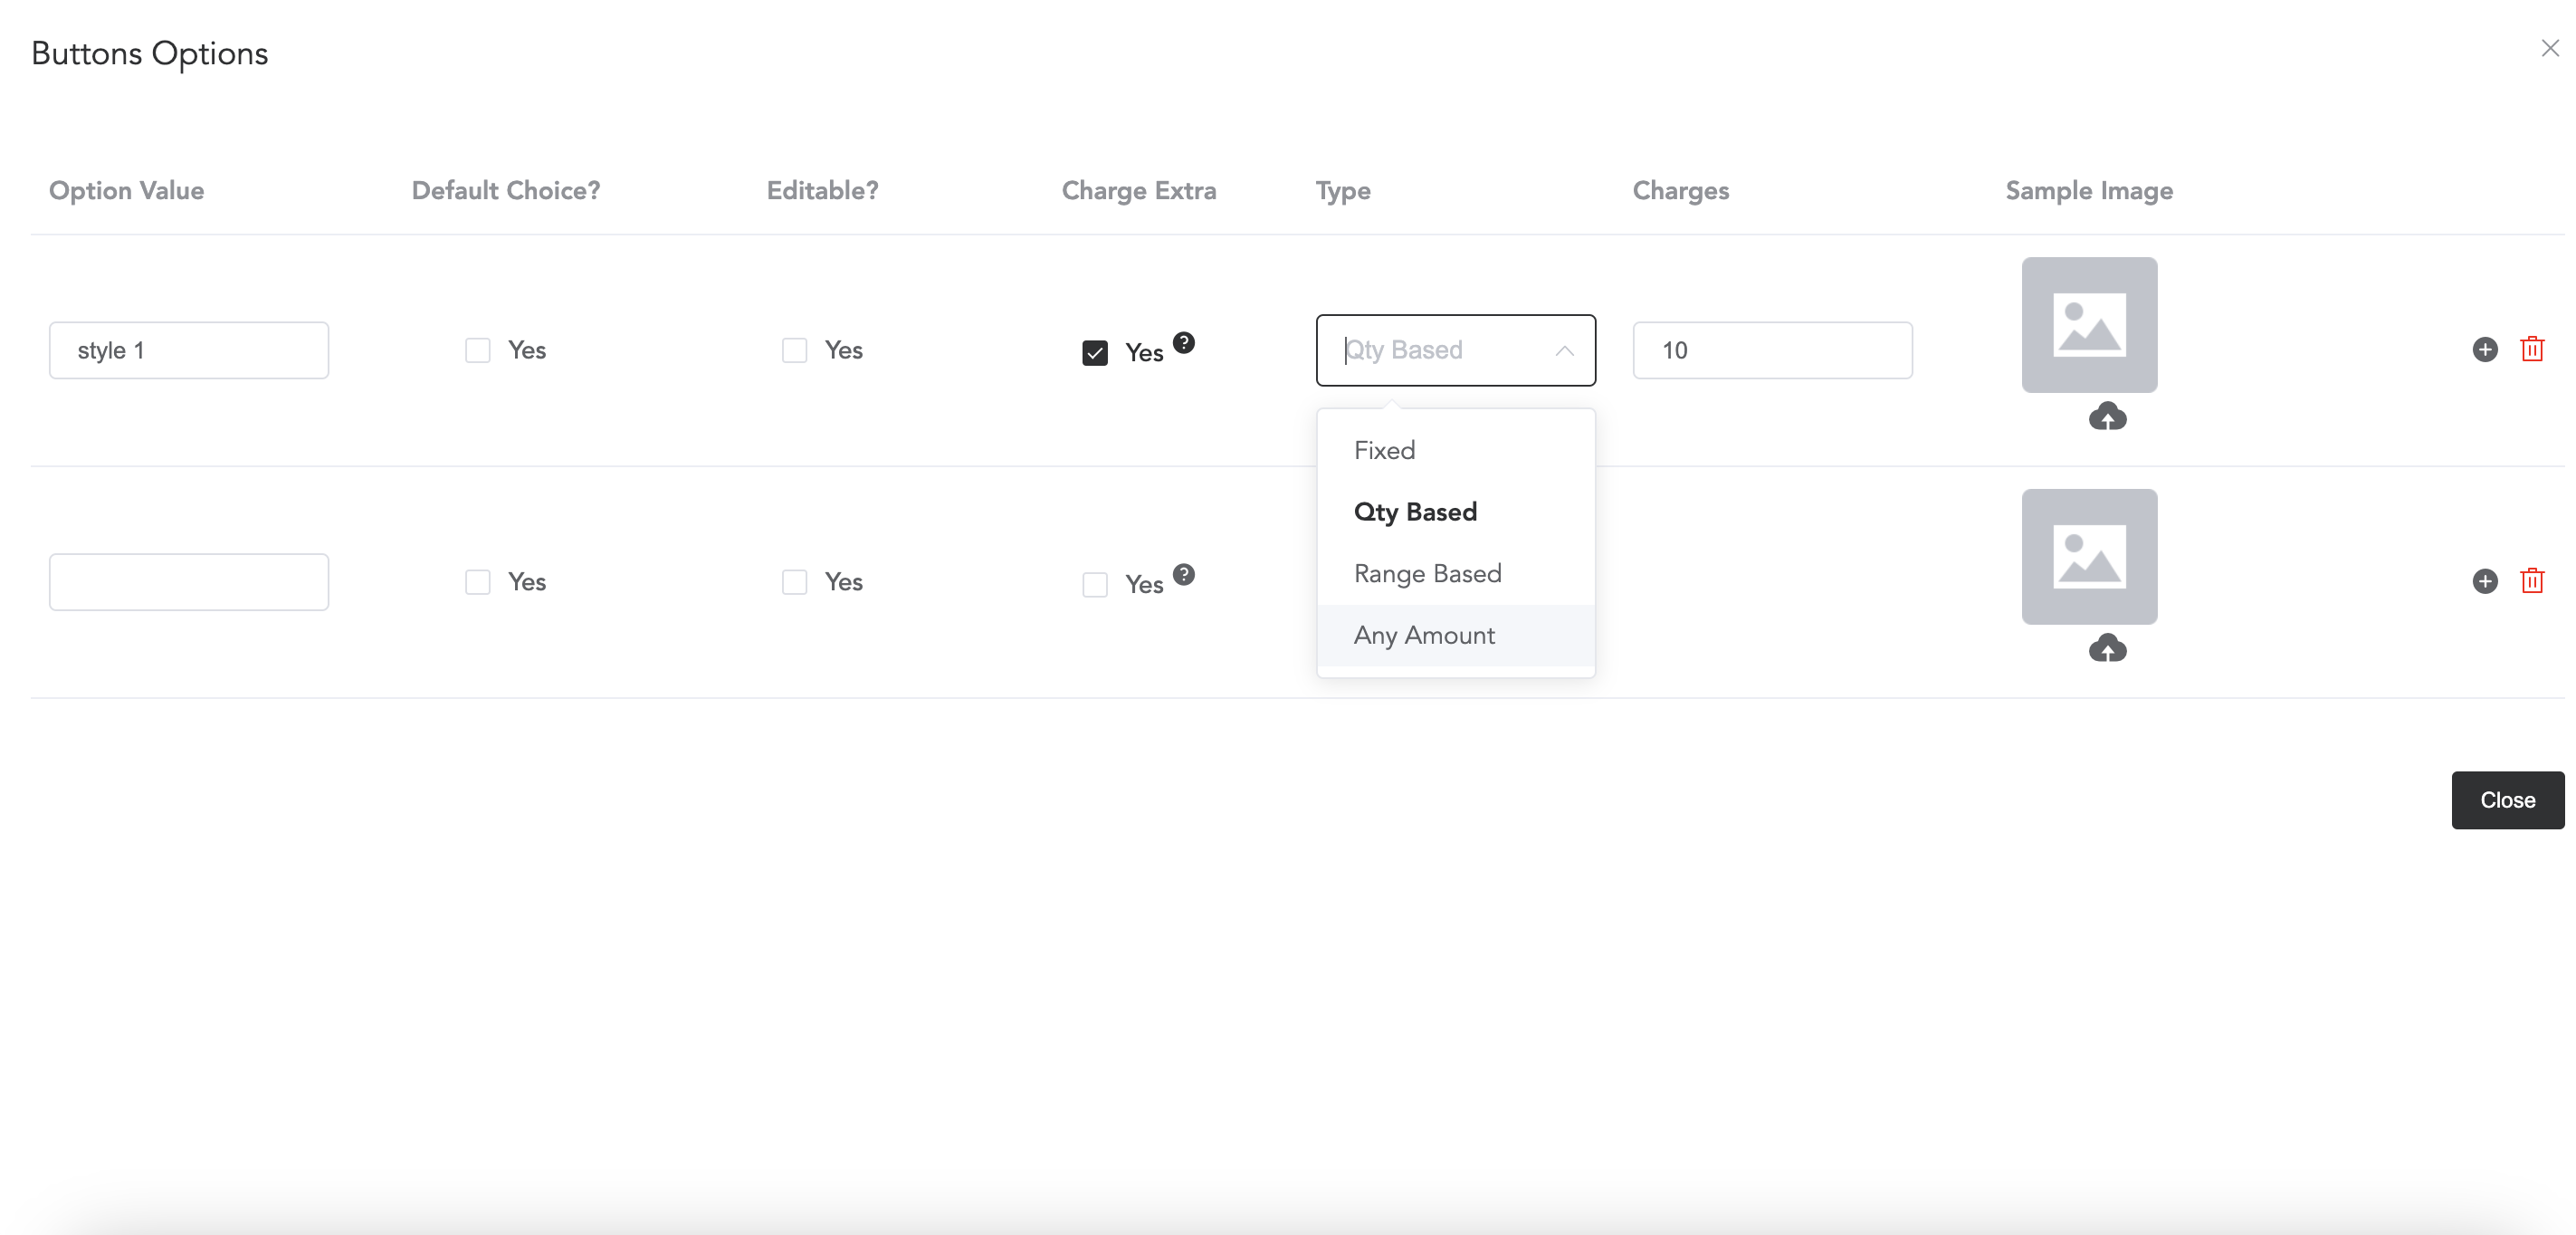
Select if the style is Default Choice or not, which means if you do not select any style while creating work orders, only the default styles will be chosen automatically.
The Editable option is if you select this then you can edit the style option column on work orders and there you can update any other details, you want for the tailor master’s understanding.
If you want to charge extra for any style then you may select the ‘Yes‘ option in the Charge Extra column. Now you will be displayed with the Extra Charges column. You can enter the extra charge (if any) amount there. Add a fixed price, quantity-based,’ price range and any other amount also.
If you select add a fixed price then, the price you set here, will appear in the work order window. Selecting a qty-based price will allow you to edit the quantity in the work order window and the price will be multiplied according to the quantity.(i.e. for different style buttons or zippers you can set a qty-based price). Set the range based price and within that range, any price can be selected in the work order window. If you select any amount, this will allow you to add any required amount for the style choices in the work order window.
You can also upload any style sample images. Similarly, you can create multiple styles by clicking Plus Sign.
- Price and Tax
Set the price and tax according to fabric price and stitching cost.
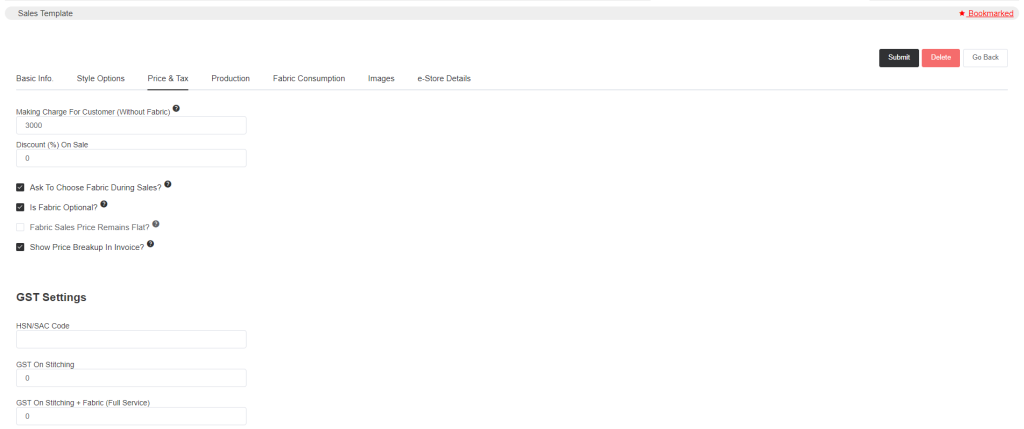
- Enter the making charge which is also the stitching charge. Enter the sales discount per cent if you offer any constant discount.
Ask To Choose Fabric During Sales, so if you select this, a fabric pop-up will appear where you can enter the fabric SKU and that will be added to the order. But if you do not provide fabric and the customer brings their fabric then, in that case, you need to make the fabric optional, so select the option Is Fabric Optional and you will be given a Close button to skip the fabric selecting process.
Select Fabric Sales Price Remains Flat if the fabric price does not vary with the size of the customer.
Show Price Breakup In Invoice, enabling this will show the fabric and stitching cost individually in the sales invoice.
In the GST Settings enter the products’ HSN Code and enter the percentage of GST on stitching. You can also enter the combined percentage of GST on stitching and fabric.
- Production
Here you can add the production details for sales templates. Details like production worker piece rate, production buffer days, etc.
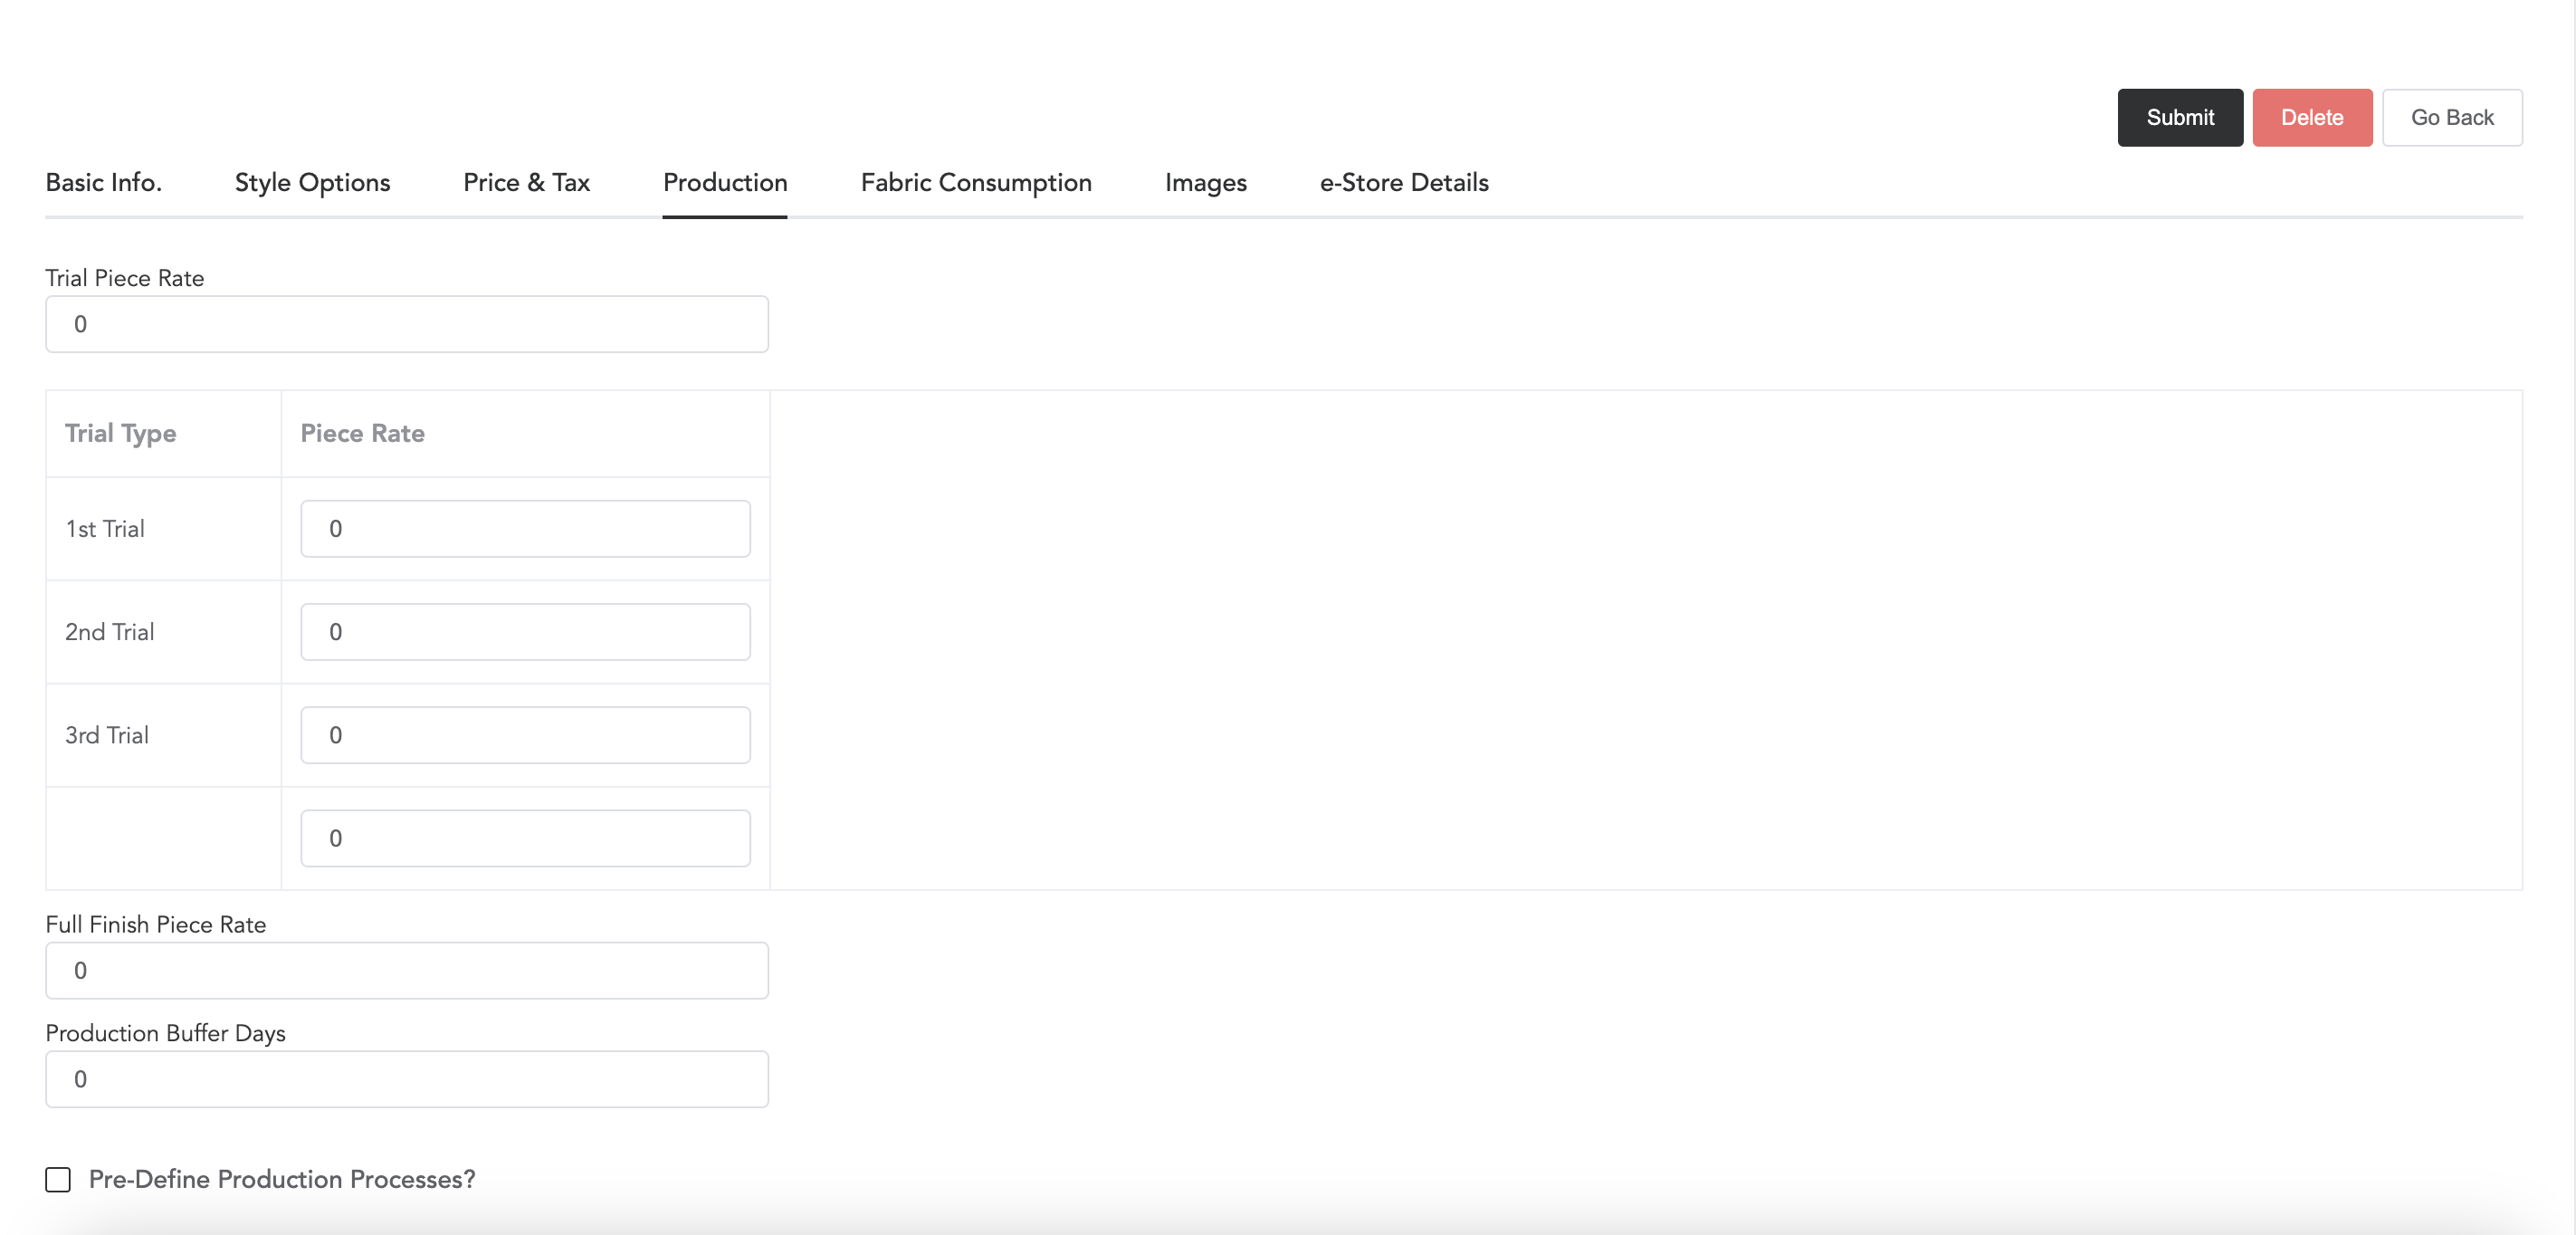
if you have not set worker piece rates in the category then you can put it here. The trial piece rate is for normal trials but if you have added trial types then you will need to define the piece rates for different trial types. Then add the finishing price. And the Production Buffer Days, you can also set buffer days in categories and here in sales templates.
Pre-Defined Production Processes: If you enable this, you can define any item’s production stages, as a result, whenever a work order is created for any item, then these pre-defined production processes will be auto-selected
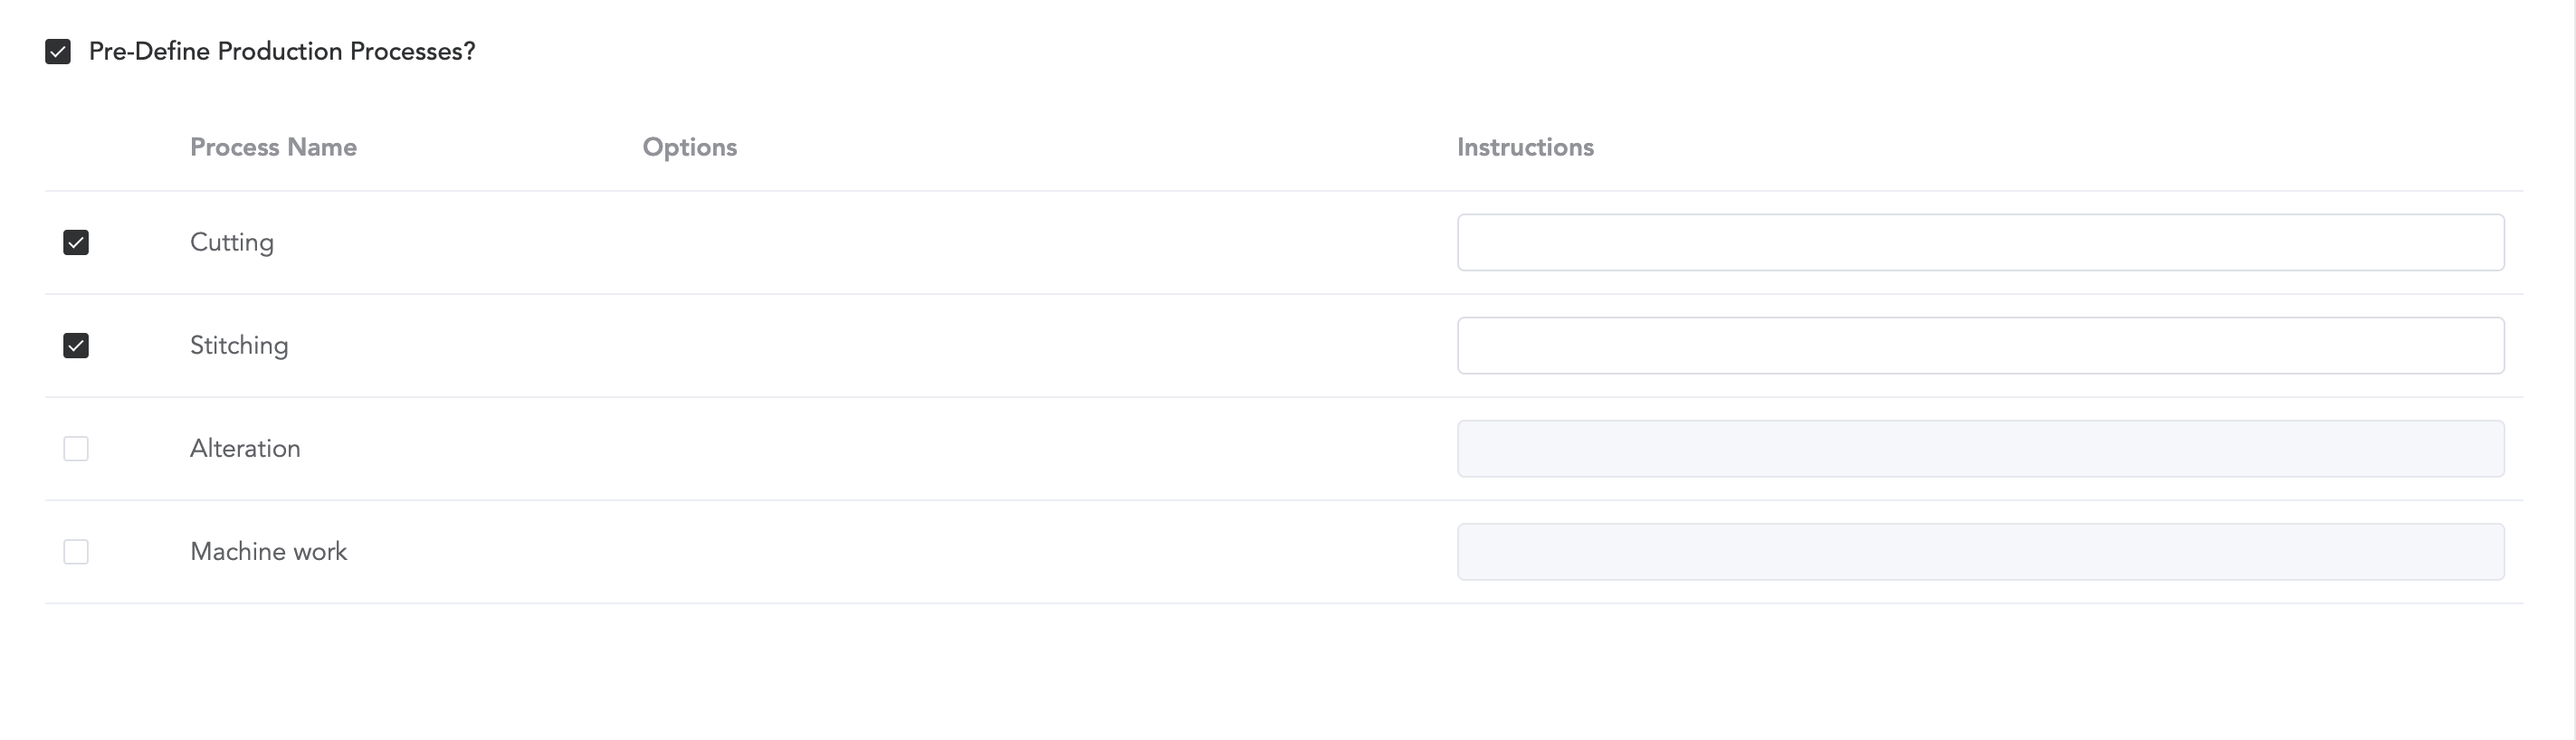
Select the production process for any particular items, and this will be required while creating work-orders.
- Fabric Consumption
Here you will record the fabric consumption. If the fabric consumption fluctuates with the size of the customer then you need to enter all the sizes in the size chart given in the image below.
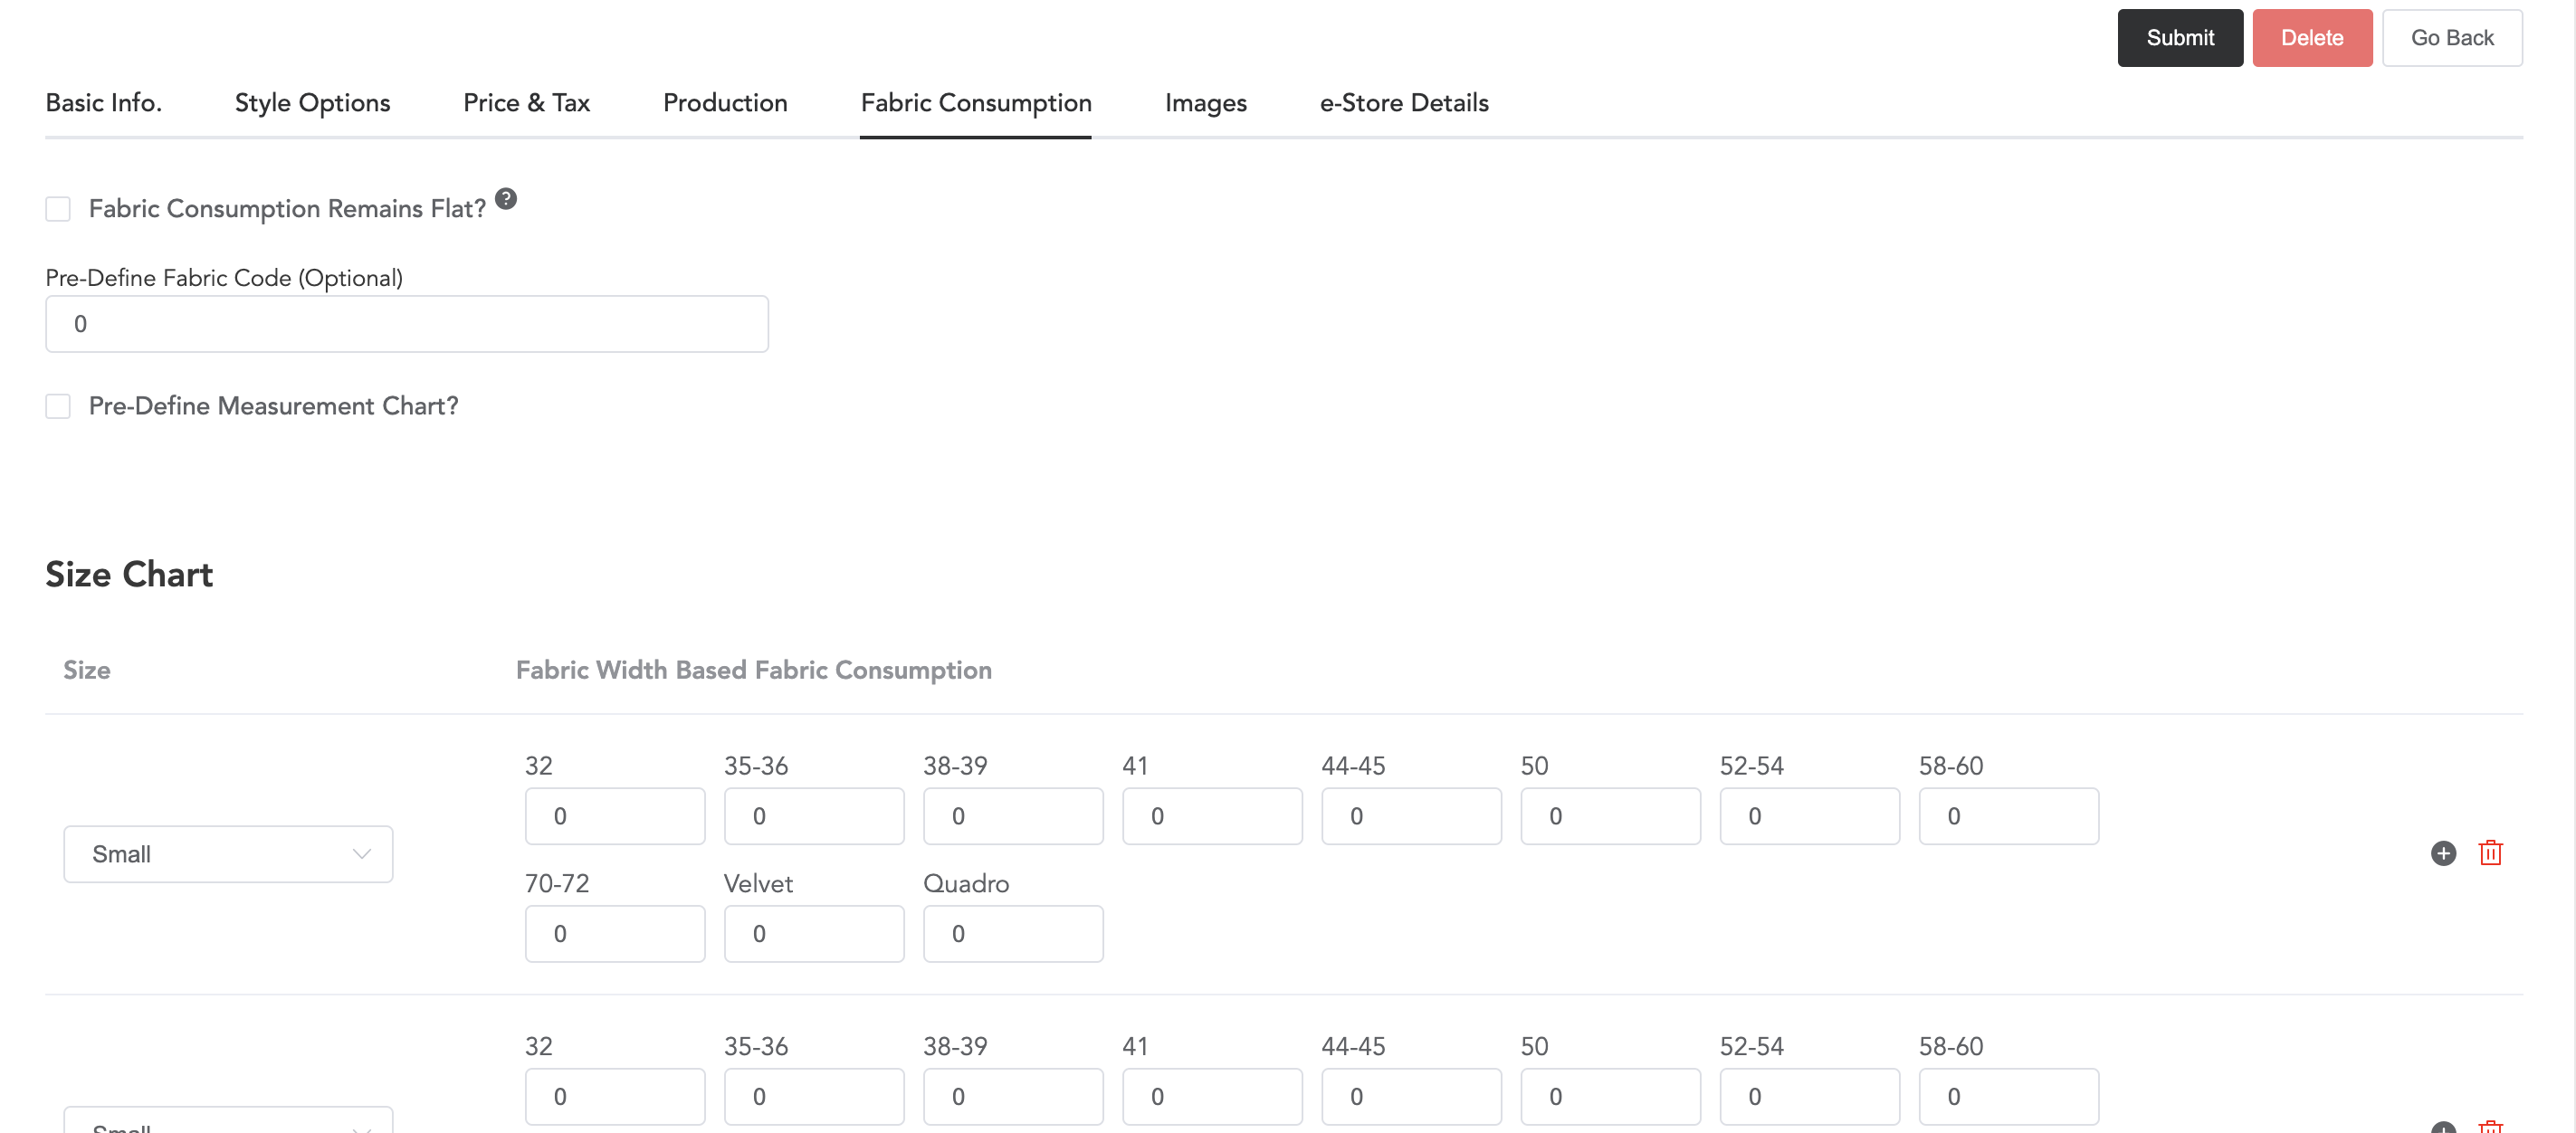
Select the size and then as per the sizes, enter the fabric consumption. Again the sizes can be defined in Setup->Tailoring Setup->Standard Sizes.
The option Fabric Consumption Remains Flat in the above image. So select this if the consumption unit does not change with the size of the customer.
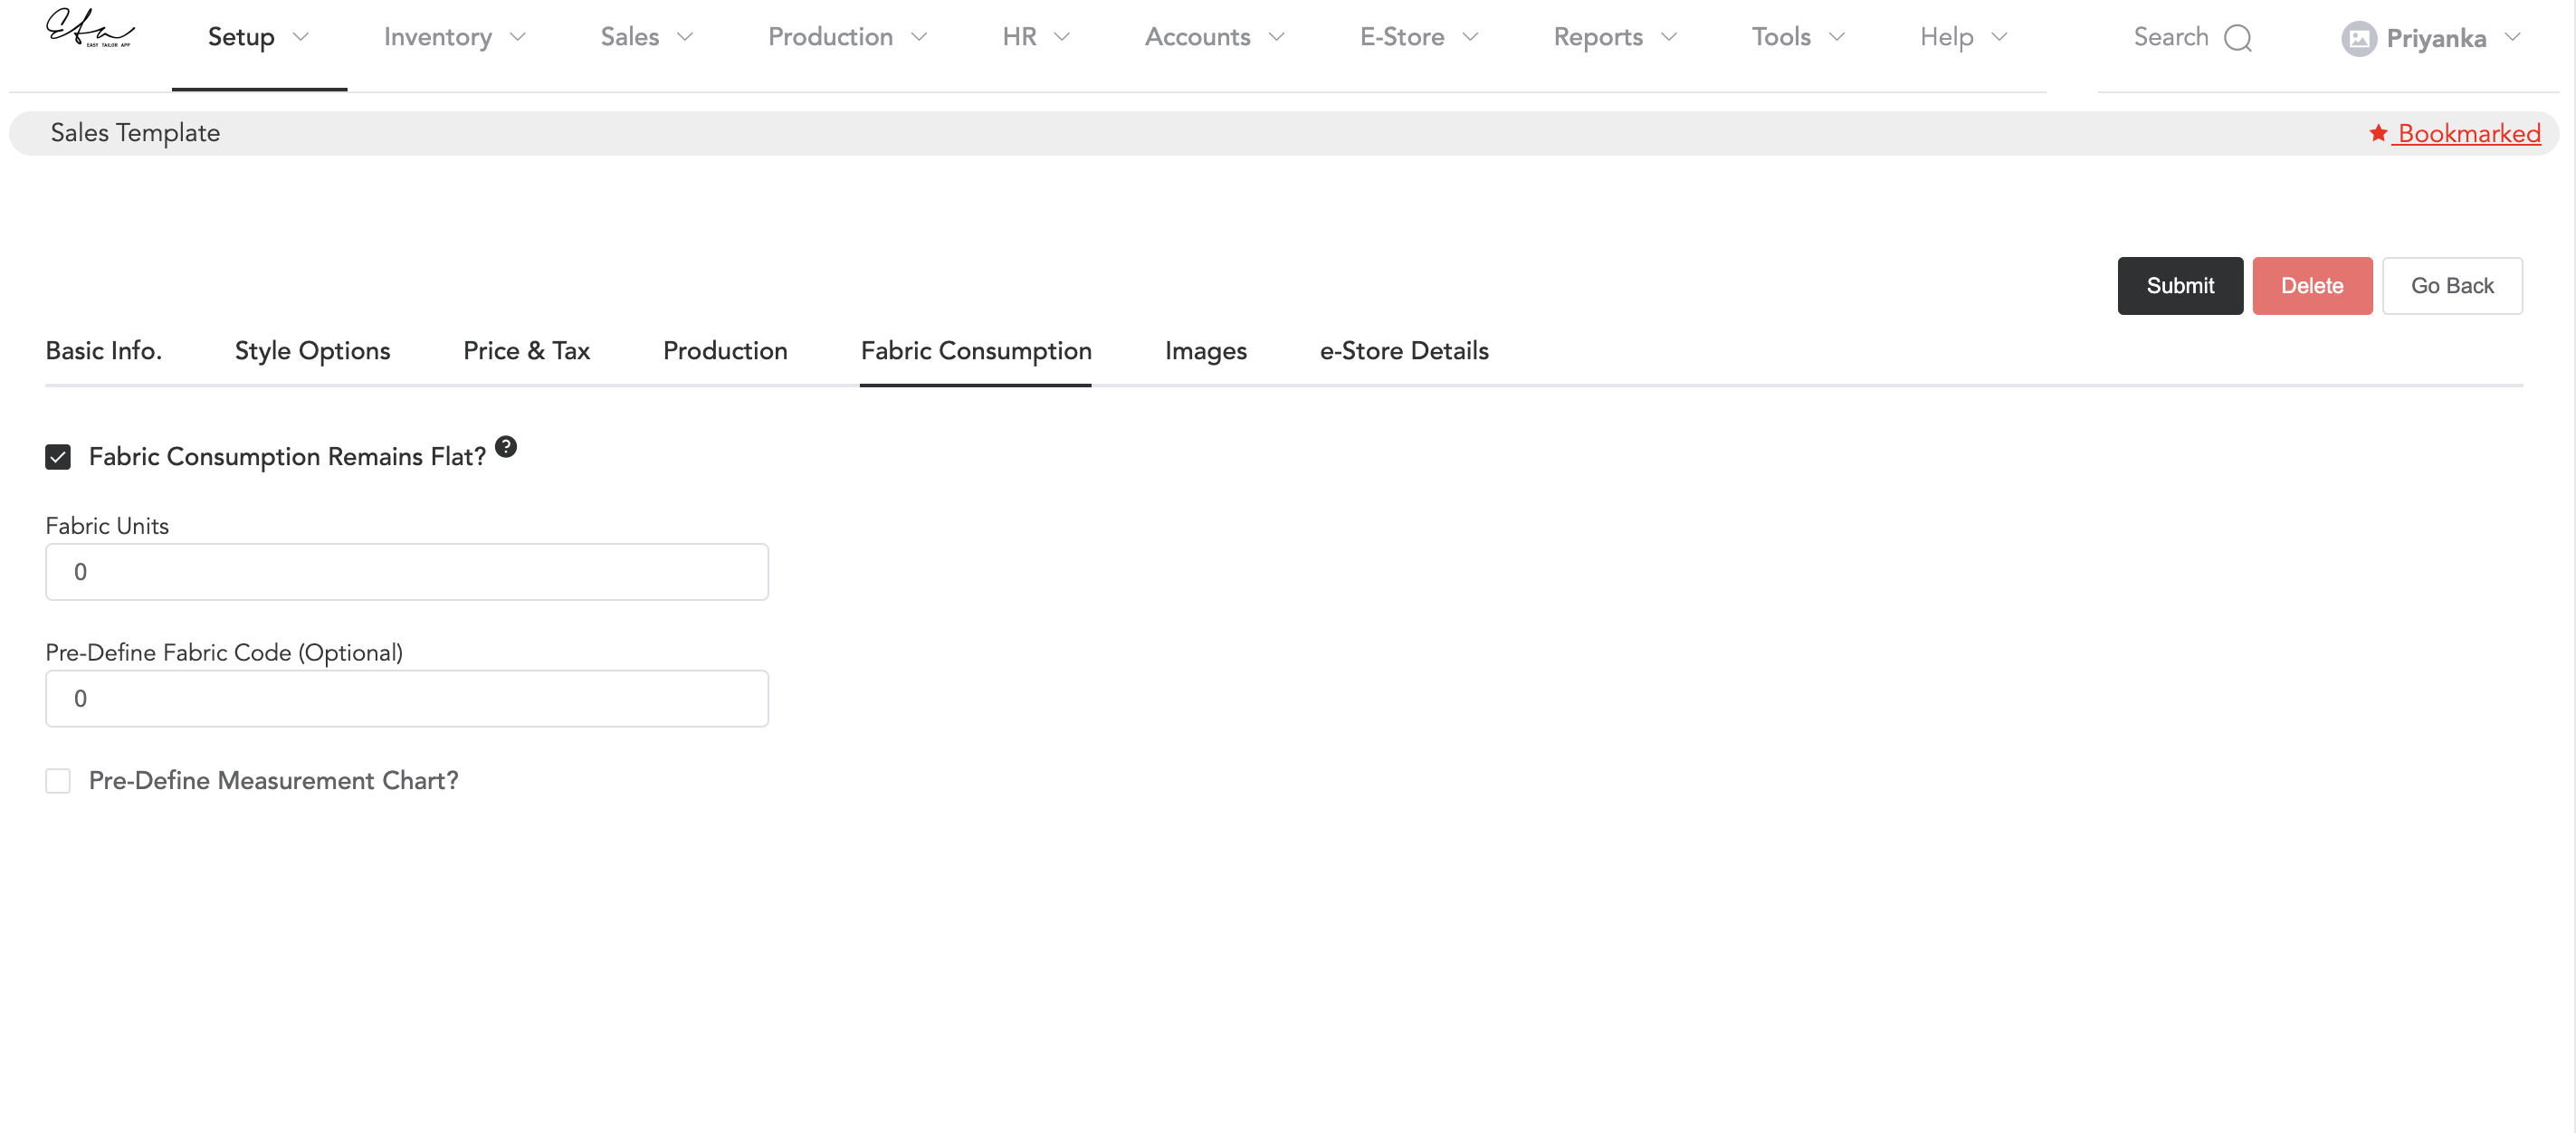
Once you select this option you will be given a column where you can set the fabric consumption unit.
‘The Pre-Defined Fabric Code‘ if it is required, a fabric that can be set for any item and at the time of adding order the fabric will be selected and added to the order. You can search and add the fabric SKU code.
Just like pre-defined production processes, if you want to set any particular measurement values for any items then you can enable the option Pre-Defined Measurement Chart
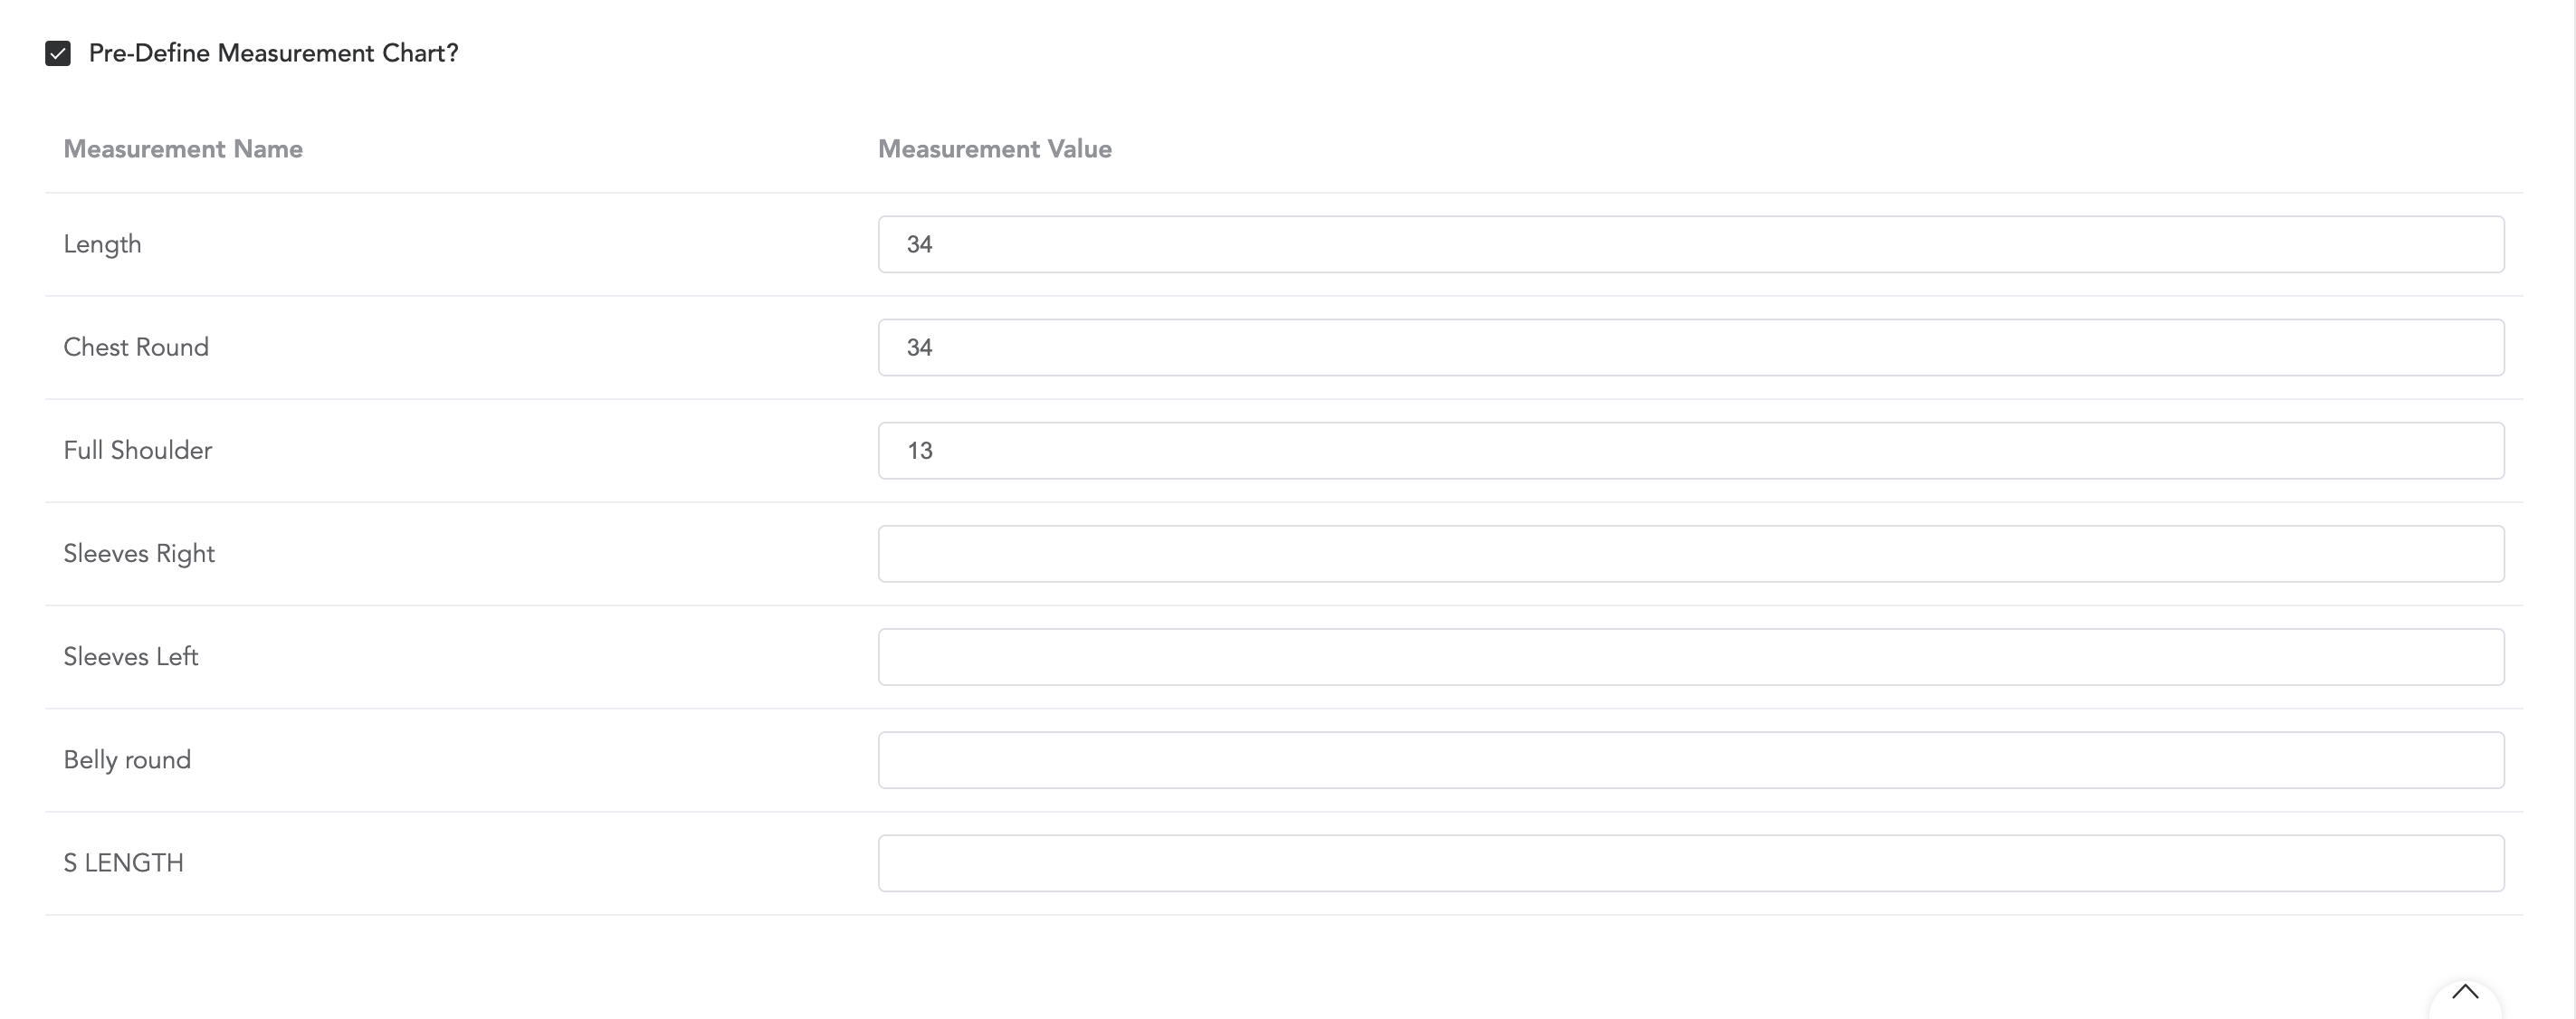
You can add measurement values, and while creating work orders, these measurement values will be there on the work order form.
- Images
Here in this section, you can upload any of the product images.

You can also choose to print the image with work orders.
When you are done entering all the details about tailoring products, click on Submit.