QR/2D Code Labels
Get the status of your work orders using the QR code. Print the QR Code according to your needs and design it according to your specifications.
Design retail item labels, stock item labels, and work-order labels accordingly. Individual tags can be created of each of these.
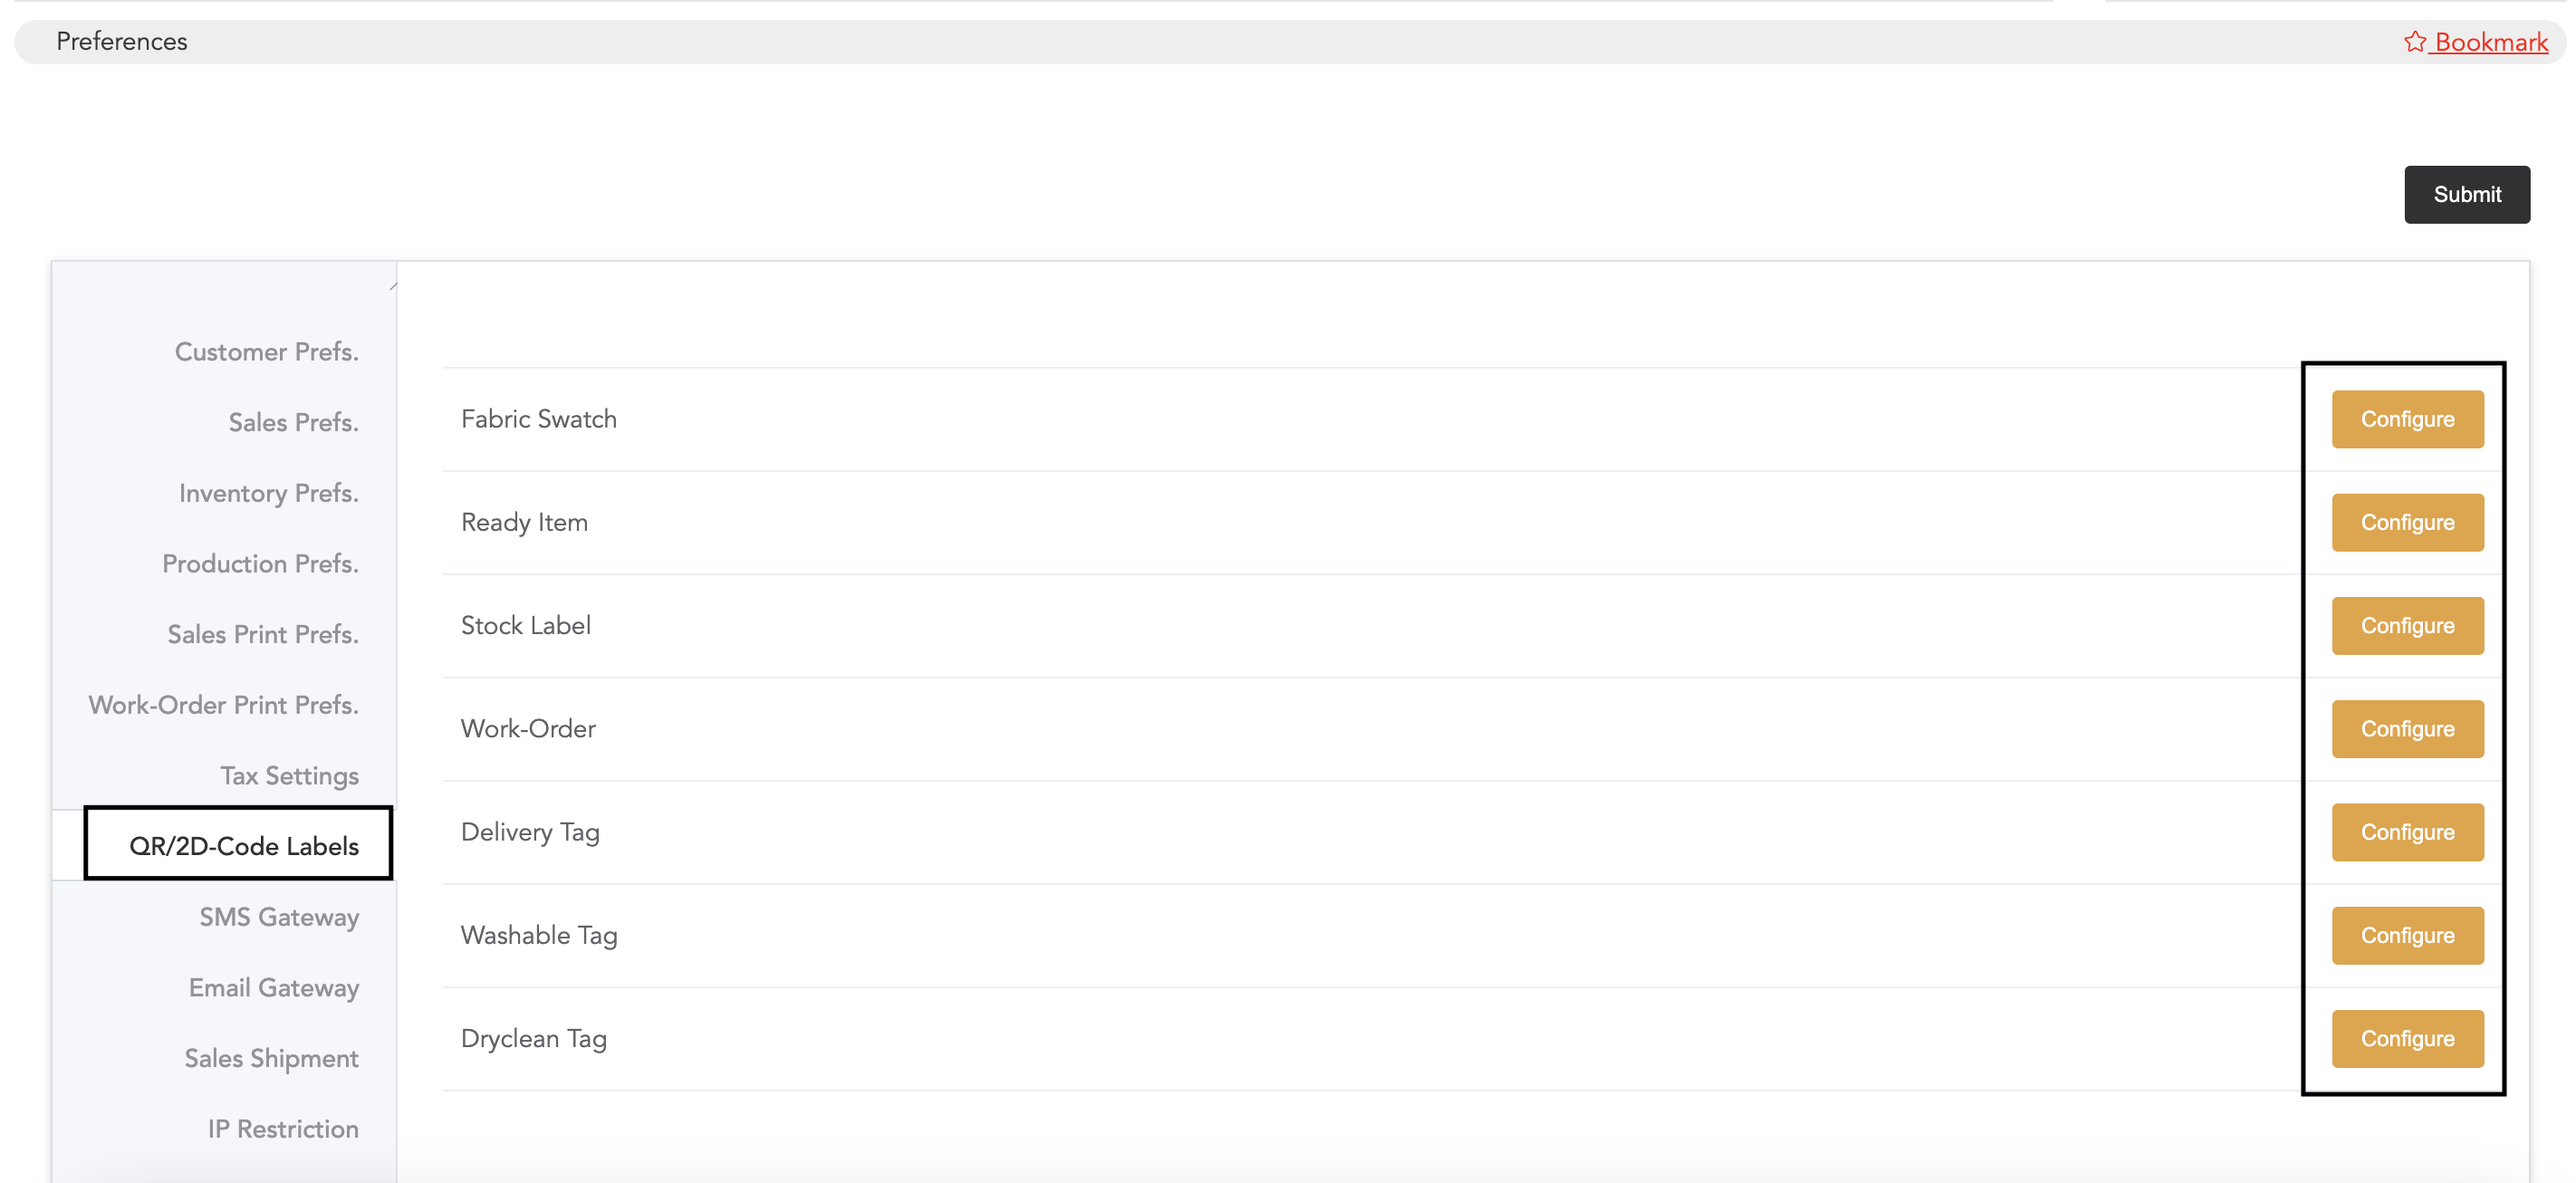
To set the labels, go to Setup, then Preferences, and now click on QR/2D Code Labels.
You can customise the size, height, and number of columns of the QR/2D Code and set the ‘Label Margins’ to adjust its placement
Tags for fabric stocks, ready/retail items, delivery, and wash instruction tags can be configured with the required details.
Click on Configure to add tags. There are two ways to create tags: QR tag labels and 2D tag labels.
How to set a QR code label:
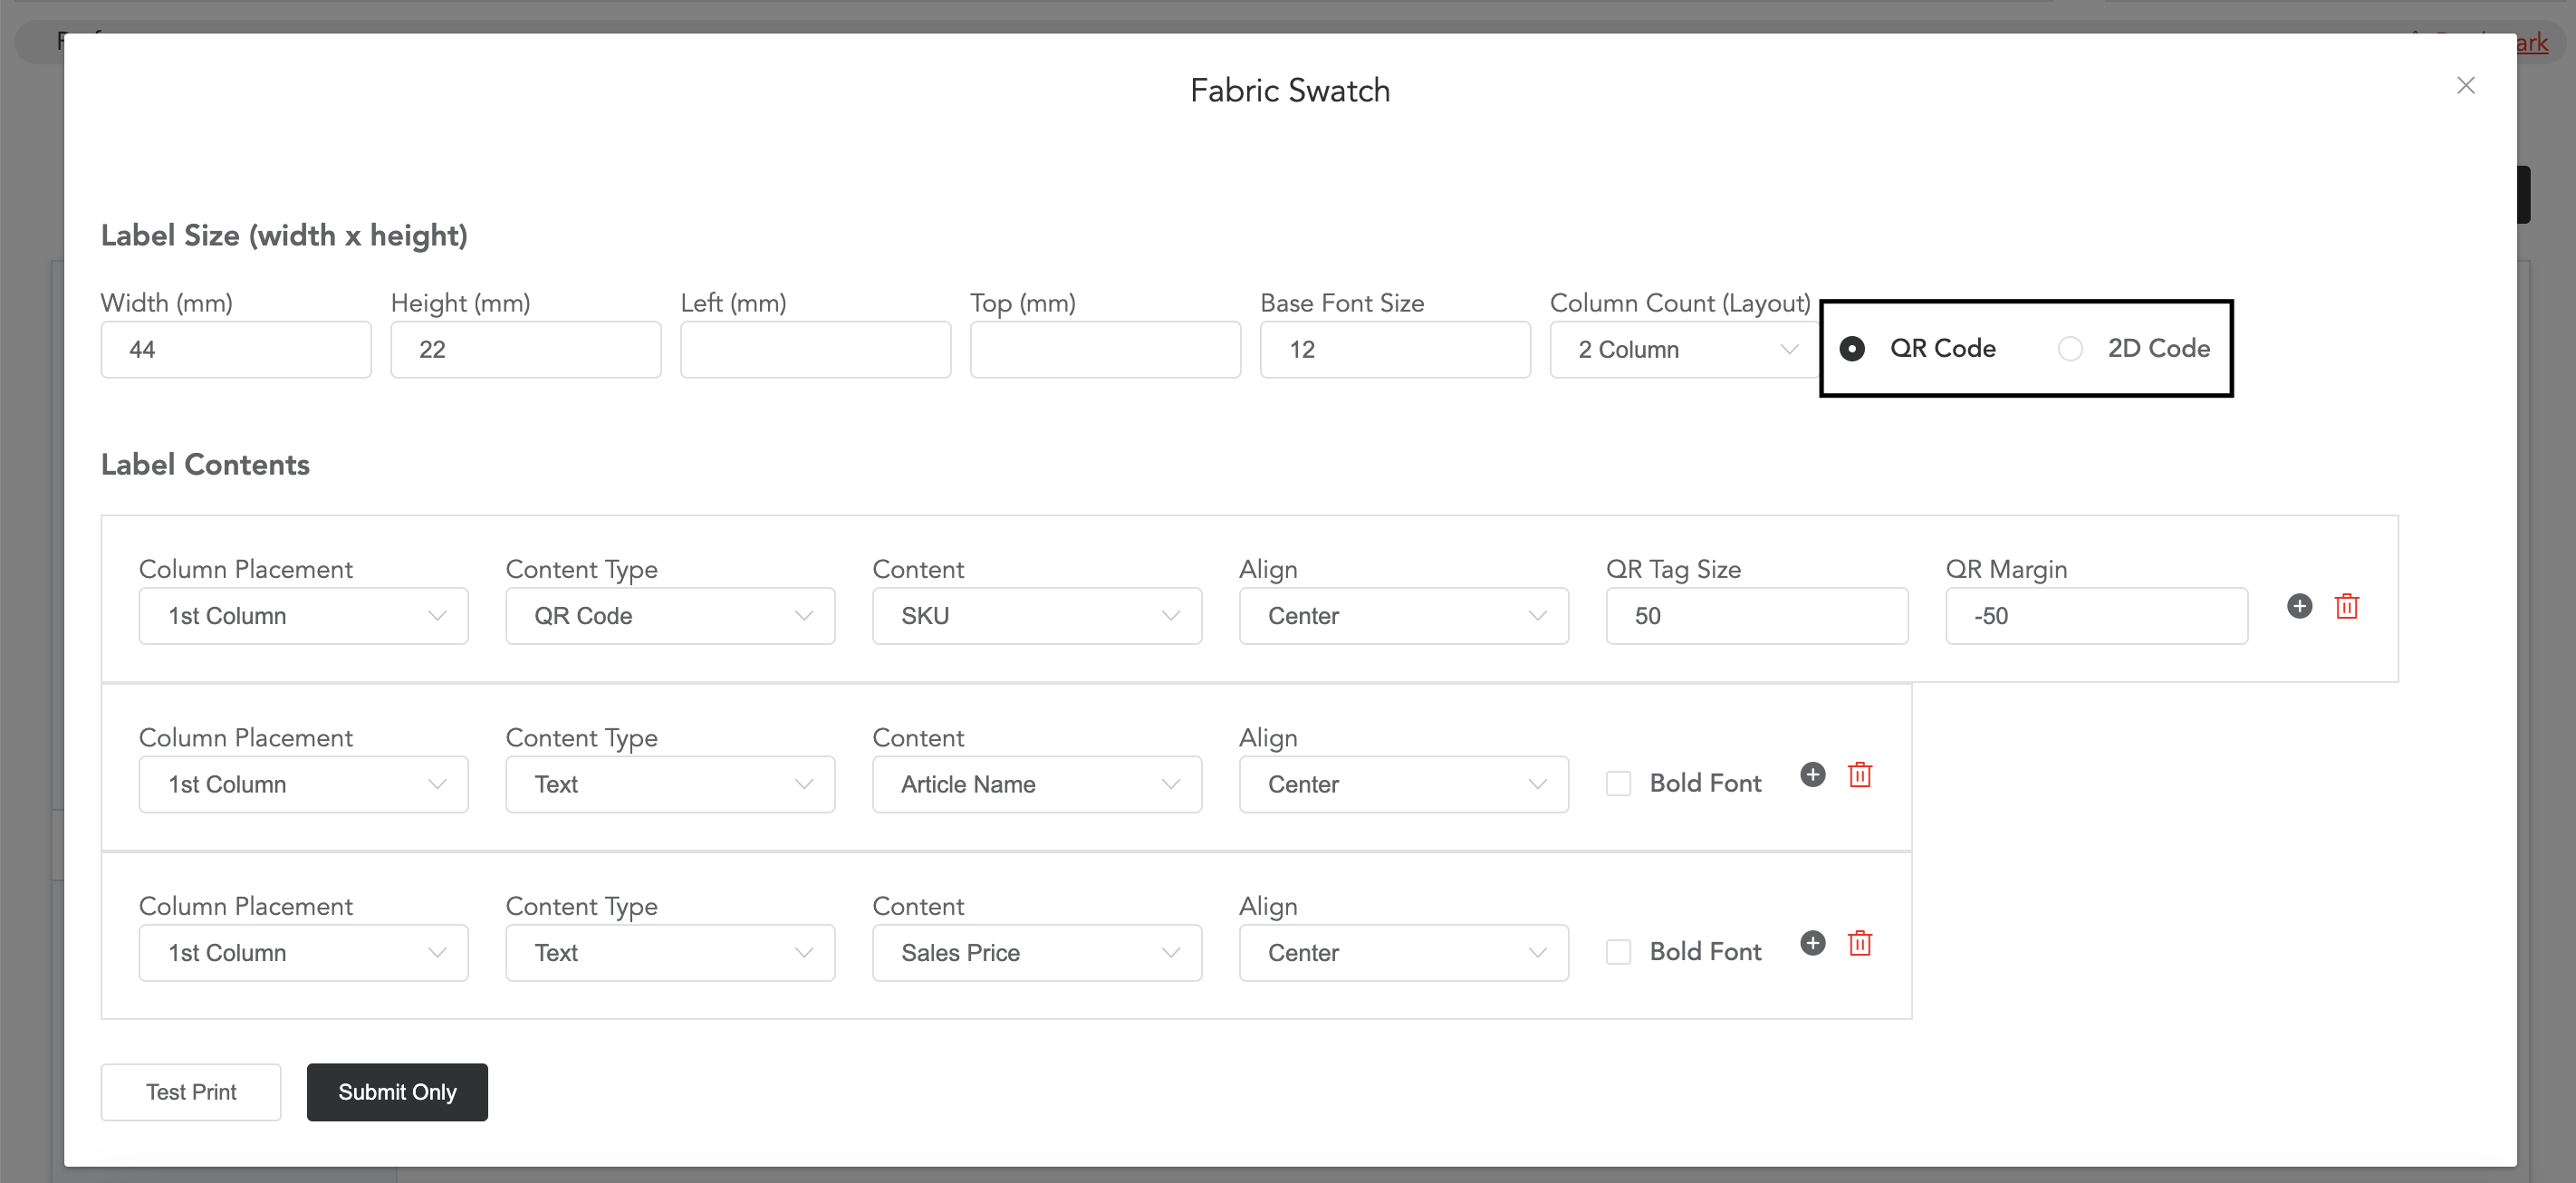
First, you need to select ‘QR Code’ and then the ‘Label Size,’ which means the size of the sticker you are using. Add the size in ‘mm.’ If your sticker size is in ‘cm,’ then you need to convert it to ‘mm’ and add it in the ‘Width‘ and ‘Height‘ columns, respectively.
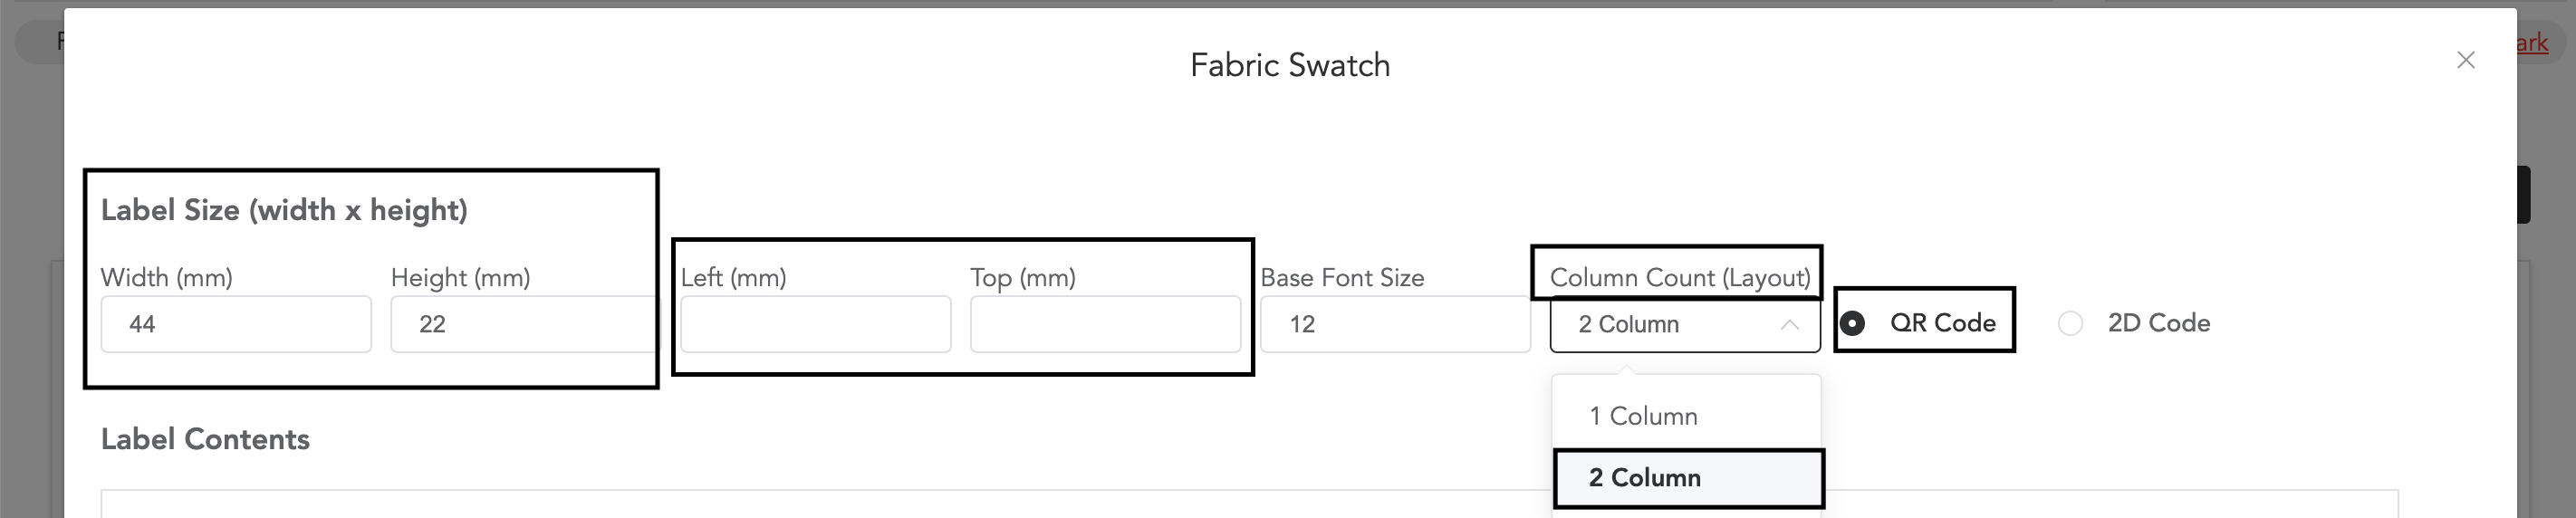
If the margin is required, then you can set the ‘Left’ and ‘Top’ margins. Add the font size as needed. And then the column count, for QR Code, keep the column count, ‘2 Column’
Next comes the ‘Label content‘, which is what details you want in the tags.
Since the tag is a QR tag, you must create two columns in the label content. In one column, there will be the QR code, and in another column, there will be contents.
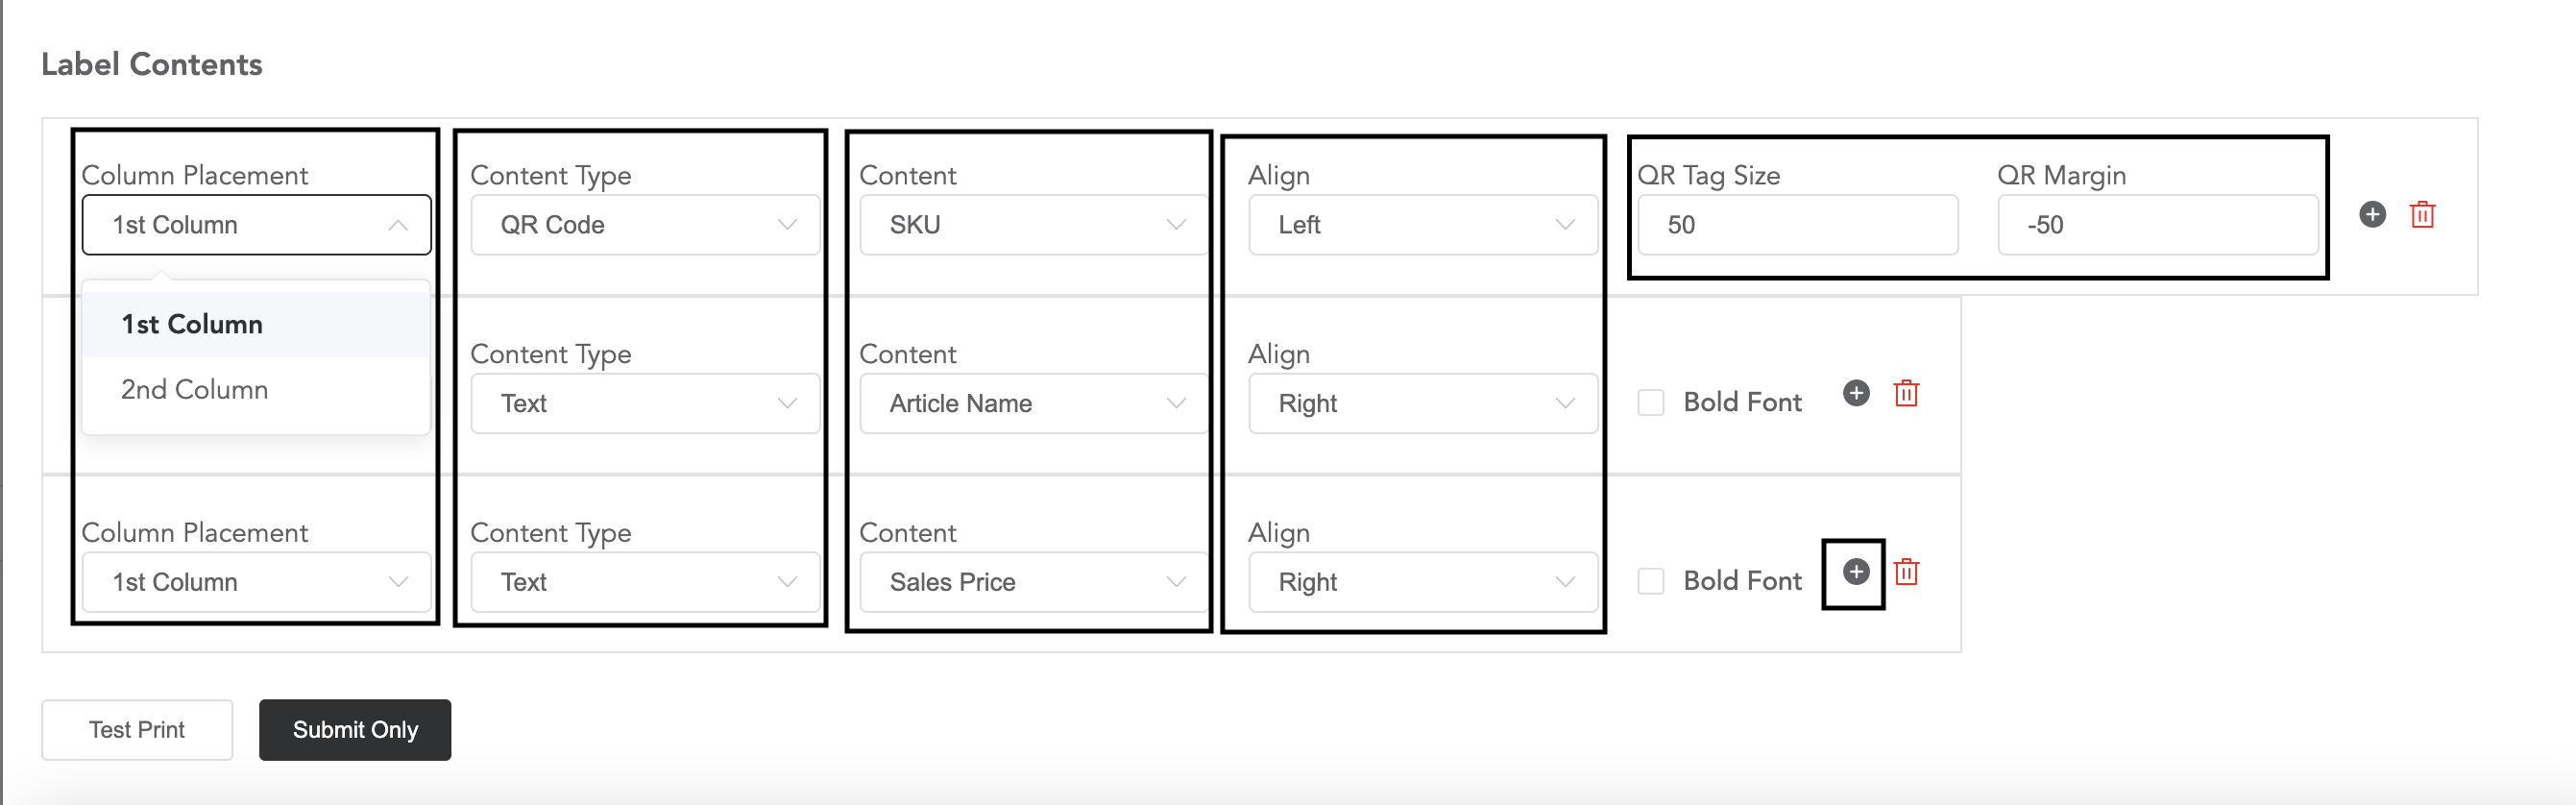
In the ‘Column Placement’, select the 1st column or 2nd column.
And select the ‘Content Type’, which means, in which column, you will add QR Code and in which you will add Text.
After that, you can select and add the ‘Contents’ for the columns. Contents like SKU, article name, sales price, etc, can be selected, and if you want to add any other, then you can simply type and add that to the content column.
The alignment for the tags can be set; the QR code and texts will be aligned to the right, left, or centre, and you can choose that.
You can set the QR tag size and margin. Select only one column for the QR code, and to create more text columns, you can click on the plus sign.
If you want the text fonts to be bold, then you can enable the option ‘Bold Font’.
How to set a 2D code label:
First, you need to select ‘2D Code’ and then the ‘Label Size,’ which means the size of the sticker you are using. Add the size in ‘mm.’ If your sticker size is in ‘cm,’ then you need to convert it to ‘mm’ and add it in the ‘Width‘ and ‘Height‘ columns, respectively.

If the margin is required, then you can set the ‘Left’ and ‘Top’ margins. Add the font size as needed. And then the column count, for QR Code, keep the column count, ‘1 Column’
If you want any logo in the 2D label header or footer, you can upload them.
Next comes the ‘Label content‘, which is what details you want in the tags.

For 2D tags, 1 column is selected in the label size section, so in ‘Column Placement,’ the 1st column will be chosen, which means the 2D code and the text contents will be placed in one column.
In ‘Content Type,’ one type will be ‘2D Code,’ and all the other content types you want to add can be ‘Text.’
Now, select the ‘Contents’ you want to be displayed on the sticker labels. Some contents will be available there to choose from, and if you want to add any brand name or store details, then you can type and add them in the content field.
For 2D Code, the alignment should be Center.
Then the ‘2D Tag Size’ can be set as per the requirement. Text fonts can be bold by enabling the ‘Bold Font’ option.
Multiple text fields can be created by clicking the plus icon. Create one field for 2D Code, and multiple fields can be created for text fields.
Once all the things are set, you can test print the tag or submit it and try to print the tags from Inventory->Master Product.