Payroll
You can enter the payroll information for the workers and employees in this window. After an employee finishes all of the tasks that have been allocated to him/her, you can create a payroll for the employee. In this manner, the system will retrieve all the information, including production pay, overtime, and other things.
Go to Accounts and then Payroll
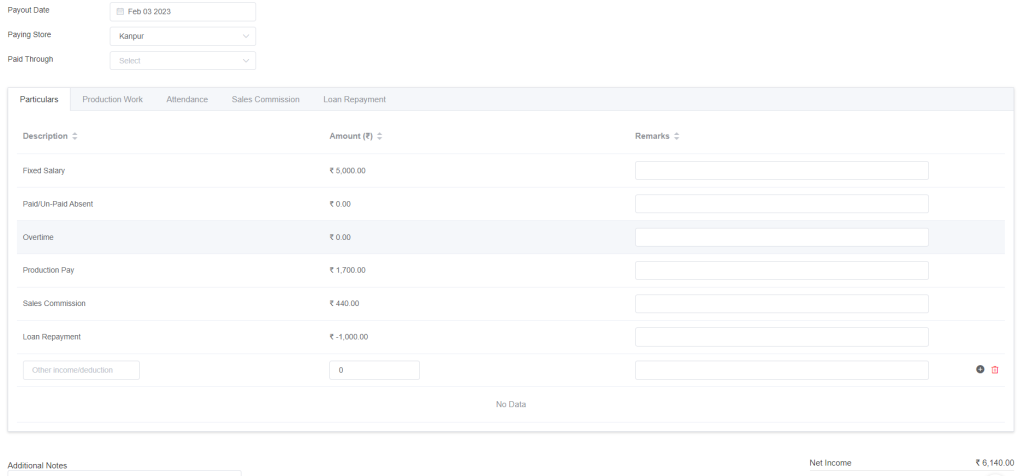
Next, choose the Payroll Period, Payout Date, and Paying Store for the Employee/Staff. The wage details, production data, and attendance details will show up. As you can see in the image above, the system will retrieve all of the facts under Particulars. Additionally, if you subtract any salary taxes, they will be shown in detail, and you can also add your own.
Similarly, you can see all the details of Production work.
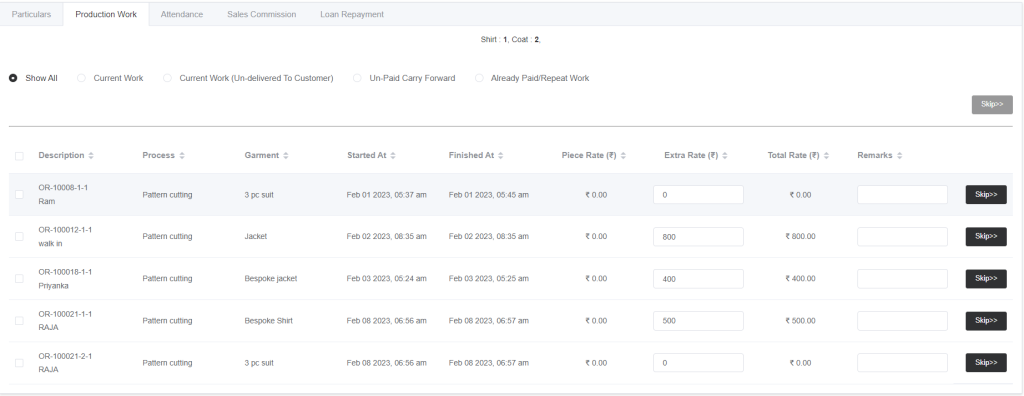
You can see all the work that was assigned to the worker. Here, the piece rate will be displayed, if you have defined it earlier in the employee profile or item in the tailoring items. If you want to add an extra rate, you can do so. All the current work, current work that was not delivered to the customer, and unpaid carry forward work, which means if you skipped any work order to calculate it in the next payroll period, that will be displayed in unpaid carry forward work. Any paid or repeated work will also be shown. You can select and skip the work to the next payroll period.
Now, the Attendance Details
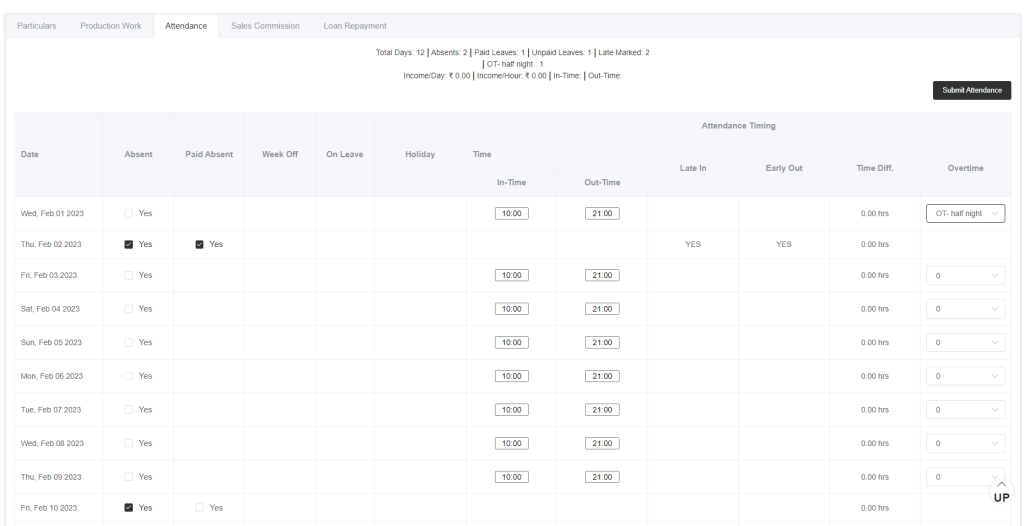
All the attendance information will be displayed here, including the total number of working days, absent days, and paid and unpaid leaves. You may also define overtime. A biometric device will track your attendance and any late arrivals and early departures. From here, you can indicate whether a person missed any days.
In the setup->HR Setup configuration, the week off, holidays, and overtime can all be customised. After finalising all the data by modifying or choosing it, click Submit Attendance.
And the Sales Commission is
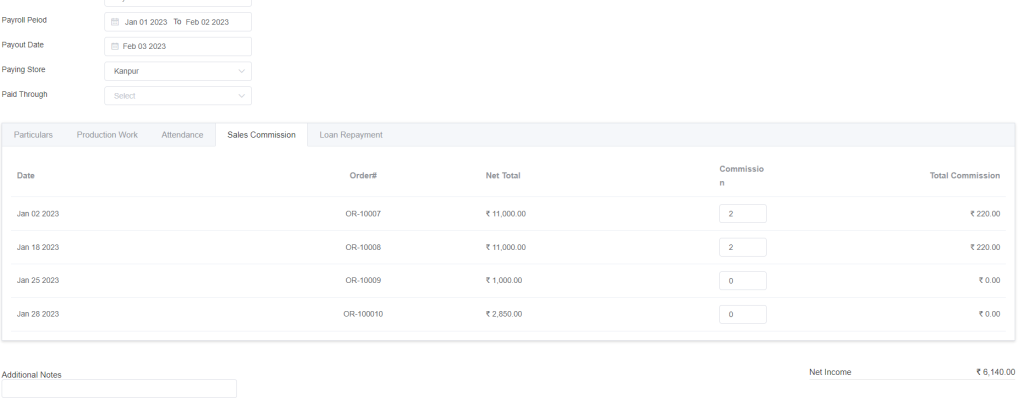
The order-wise net total amounts are shown in the image. You must enter the commission percentage in the commission column to compute the total commission.
Let’s look at the final one, loan repayment.
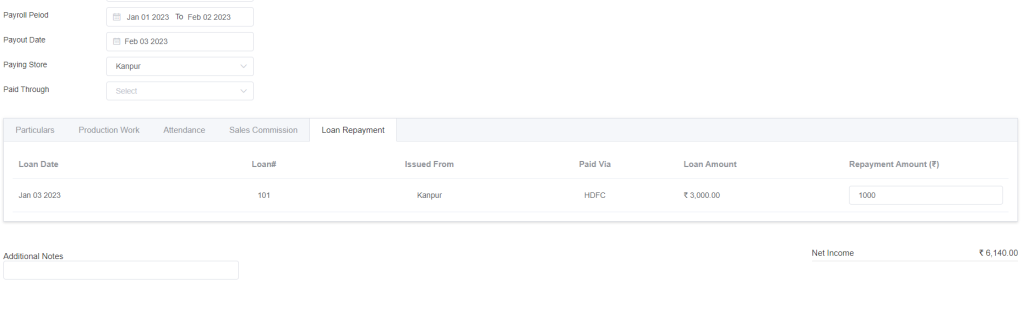
Now, the loan repayment amount (which you can choose when giving the worker a loan) will be subtracted before the net income is determined. Additionally, if the borrower chooses, they may pay back the entire loan amount at a time. The total loan amount can then be added here in the repayment amount field.
You can enter any message for internal use in the additional note column before submitting the paycheck.