Customers
This section displays your customer information. Their name will displayed here, along with all their basic information. If you want to edit and make some changes to your customer profile, then you can do it from here. You can define if the customer is an individual or a business.
Go to Sales and then Customers.
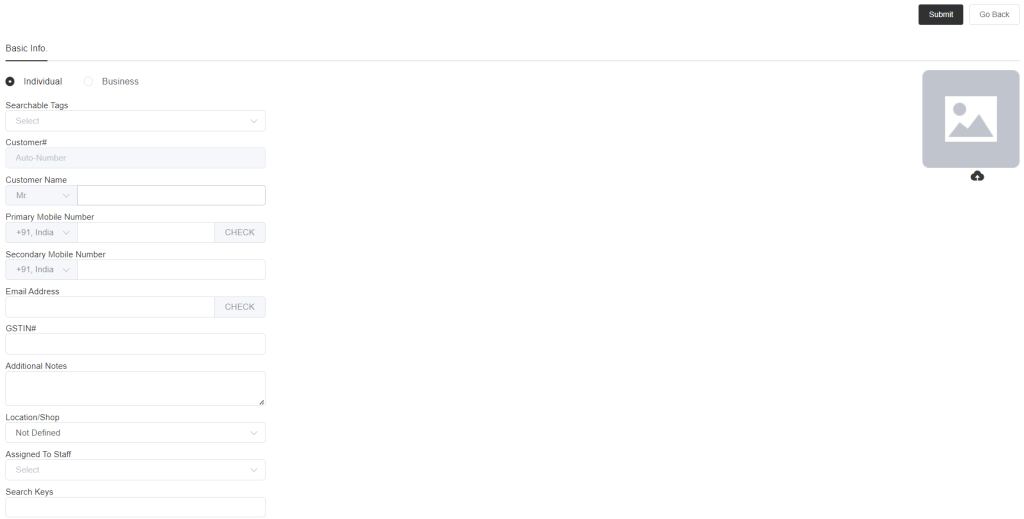
You need to add information about the customer. The option Searchable Tag is the customer tags that you created in the setup->sales setup. You can do the tagging by entering whether the customer is a family customer, a formal customer, etc. Select the tags. The customer number is system-generated. Name and primary mobile number is mandatory, and all other options are optional. You can also make the Email ID mandatory so that without the email ID the customer profile can not be saved. To make it optional or mandatory, go to setup->preferences->customer pref. However, having an email ID in place will help you to send emails to the customer.
Add notes, choose the store location, and choose the name of the staff who will assist the client. For a search reference, the search key might be anything, like email ID, mobile number, name, etc., and by using the search key, the customer profile can be searched.
- In the next part, you can add billing and shipping addresses.
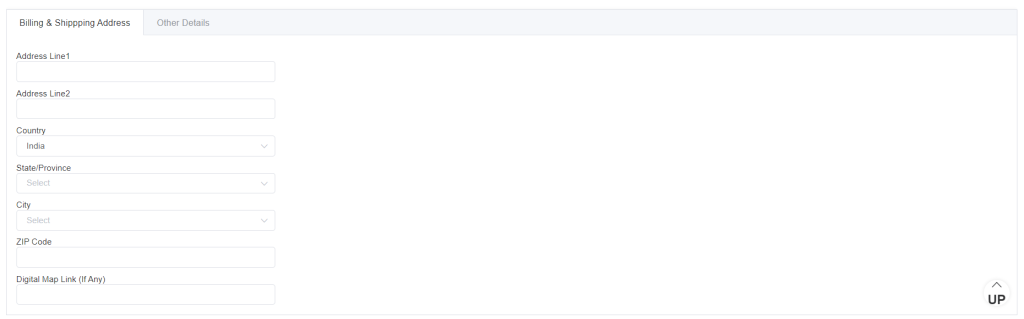
Select the details like address, country, state, city, ZIP code, and map link to find the customer’s exact location.
- In the Other details part, you can select the billing currency, which means in which currency you will make bills for this customer.

Choose the Billing Currency, the client’s gender, the customer’s date of birth, and whether the customer is married.
- If you make a profile for a business entity, then you need to select Business.
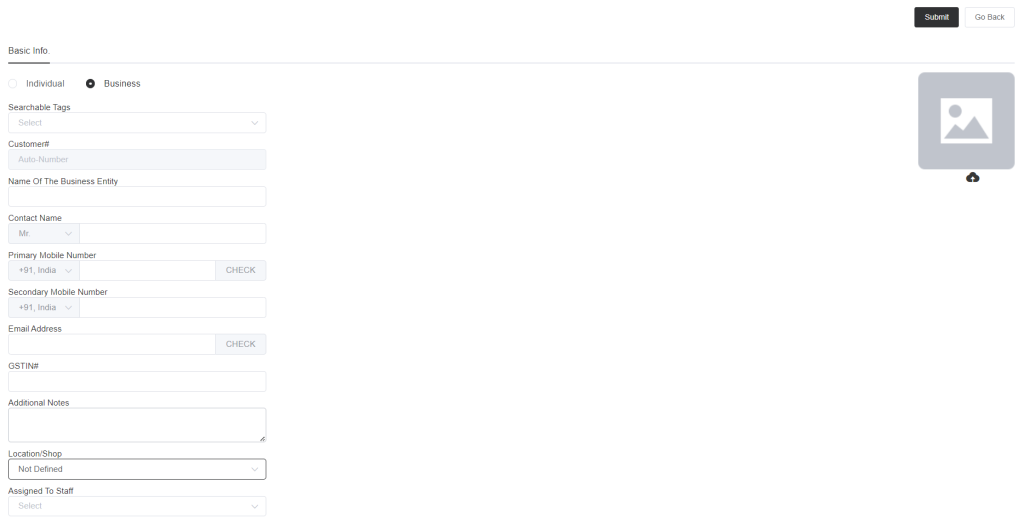
Add all the details like individual customers, the only difference is you will need to enter the business entity name and everything else will be similar to individual customers.
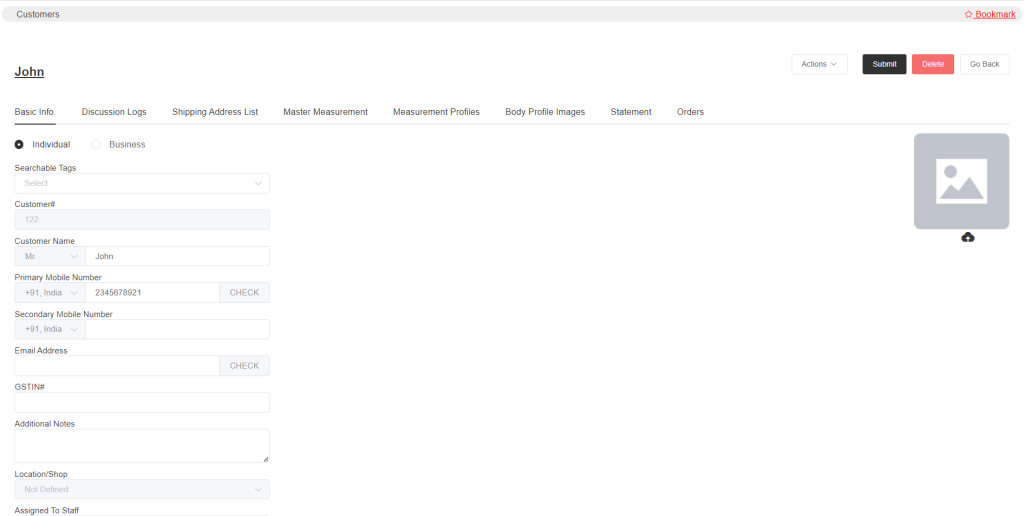
As soon as you submit the customer profile after adding basic details, then you will see other fields like Shipping Logs, Master Measurement, Measurement Profile, Body Profile Images, etc.
The basic info. is explained above, and the other points you will know here.
- Discussion Logs
The discussion log is nothing but the communication records you have with your customers.
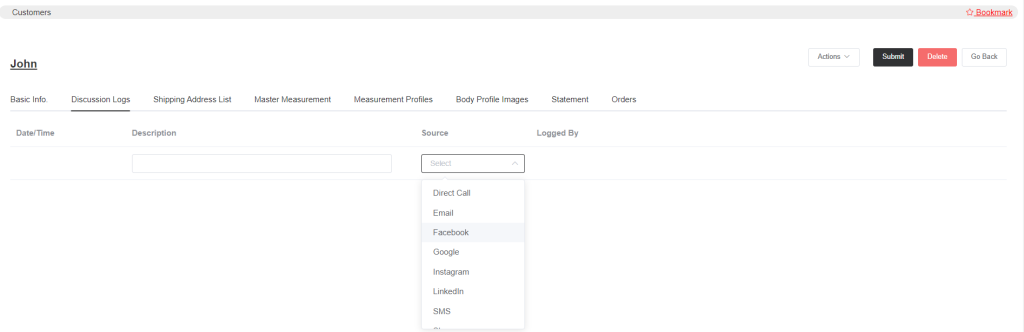
Enter the description, and source of communication/interaction and the logged employee’s name will be recorded according to their ID.
- Shipping Address List
You can add multiple shipping addresses of a customer. Also, you may print the address (if necessary) in a postcard-size paper format.
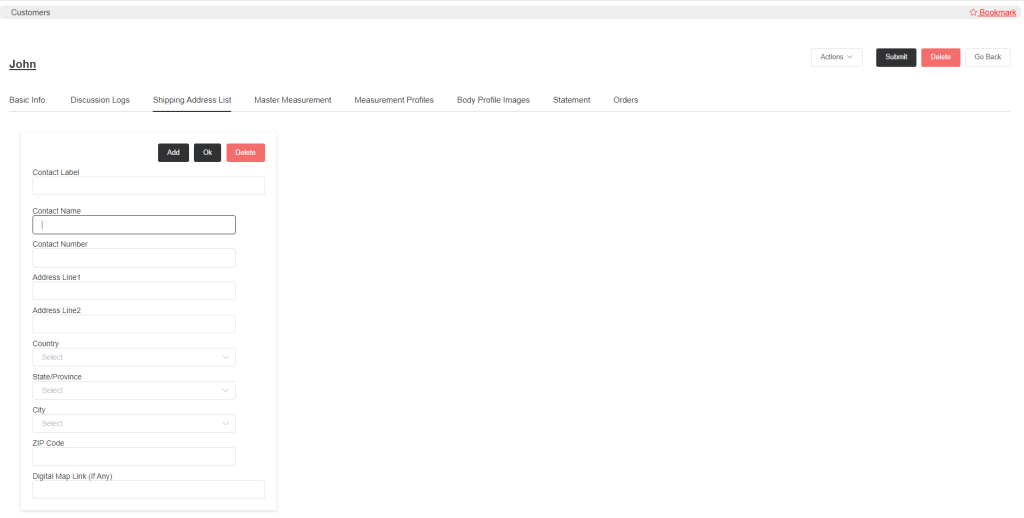
Enter all the address details in the columns and to save it click ok. Next, if you want to add a new address then click add.
- Master Measurement
The measurements of the customer can be saved here and at the time of creating the work order, the measurement values get copied to the work order window once you add the measurement values.
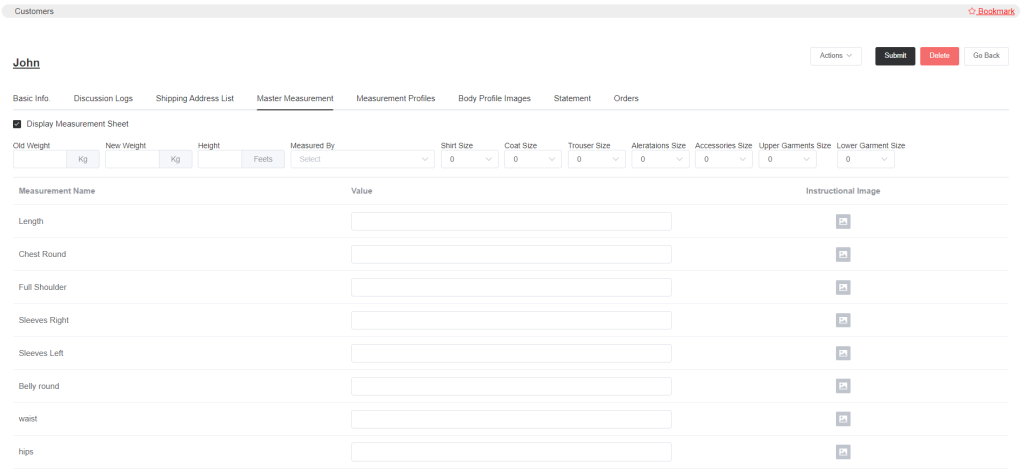
Select the option Display Measurement Sheet. Then you will be presented with the measurement sheet where you can put measurement values and other details like size, weight, height, etc. Again to create measurement names go to the setup->tailoring setup->master measurement sheet.
- Measurement Profiles
Here, you can record the customer’s measurements according to your tailoring category. Suppose you have created four or five garment categories in the setup section, then, for those categories, you can create individual measurement profiles in the customer profile.
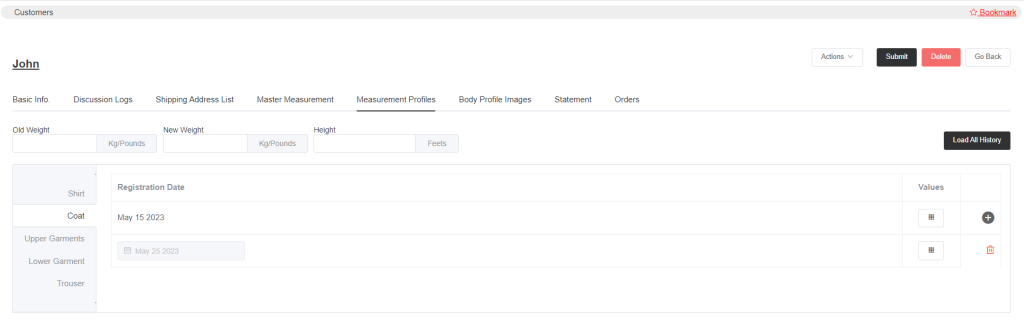
You can see the garment categories in the image. Click on the plus sign to register a new measurement. Click on the plus and then click on the ‘values’ written column and register the new measurement.
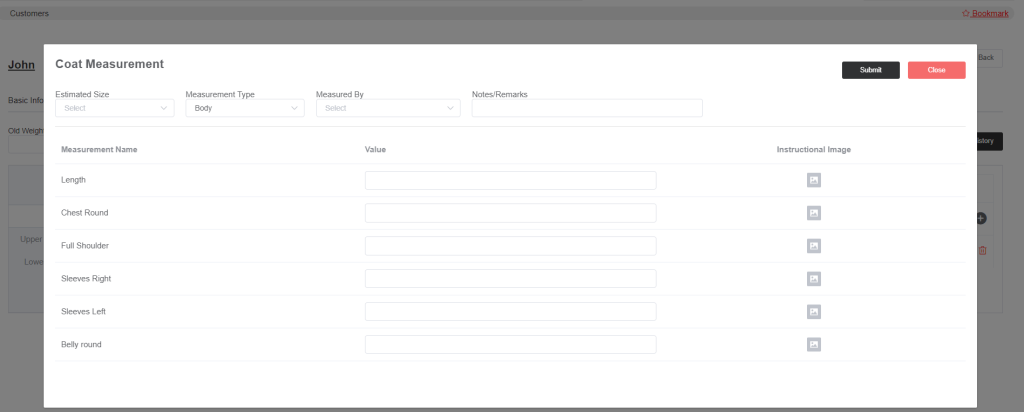
Enter the measurement values for each individual category and submit with adding other details.
If you want measurement history, then click on Load All History.
- Body Profile Images
In this section, you can upload customer images like front, back, and side profile images. These profile images will be saved and whenever you create a work order, the photos will get printed in the work order print form.
- Statement
All the customer’s transaction details will be displayed here. Put a date range that you want to see and click search, all the transaction will be listed between that date range.
- Orders
The order history details of the customer will appear in the order section. You can view all their orders from here.
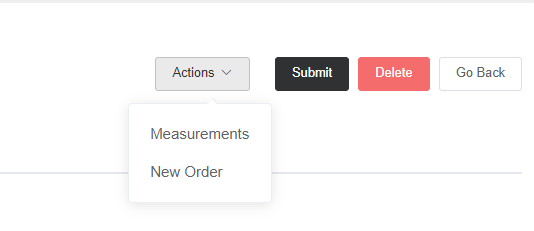
The Action option will let you print the measurements, and from there, you can create new orders for the customer.