How To Import Master Inventory
You can now upload and update the master inventory data.
Note that this will not update the inventory stock, this will only update the master profile. For the stock update, you need to add Purchase Invoices or use the direct stock update module, Reconcile Stock Module which is in the Inventory Module.
Prepare the CSV sheet and upload that.
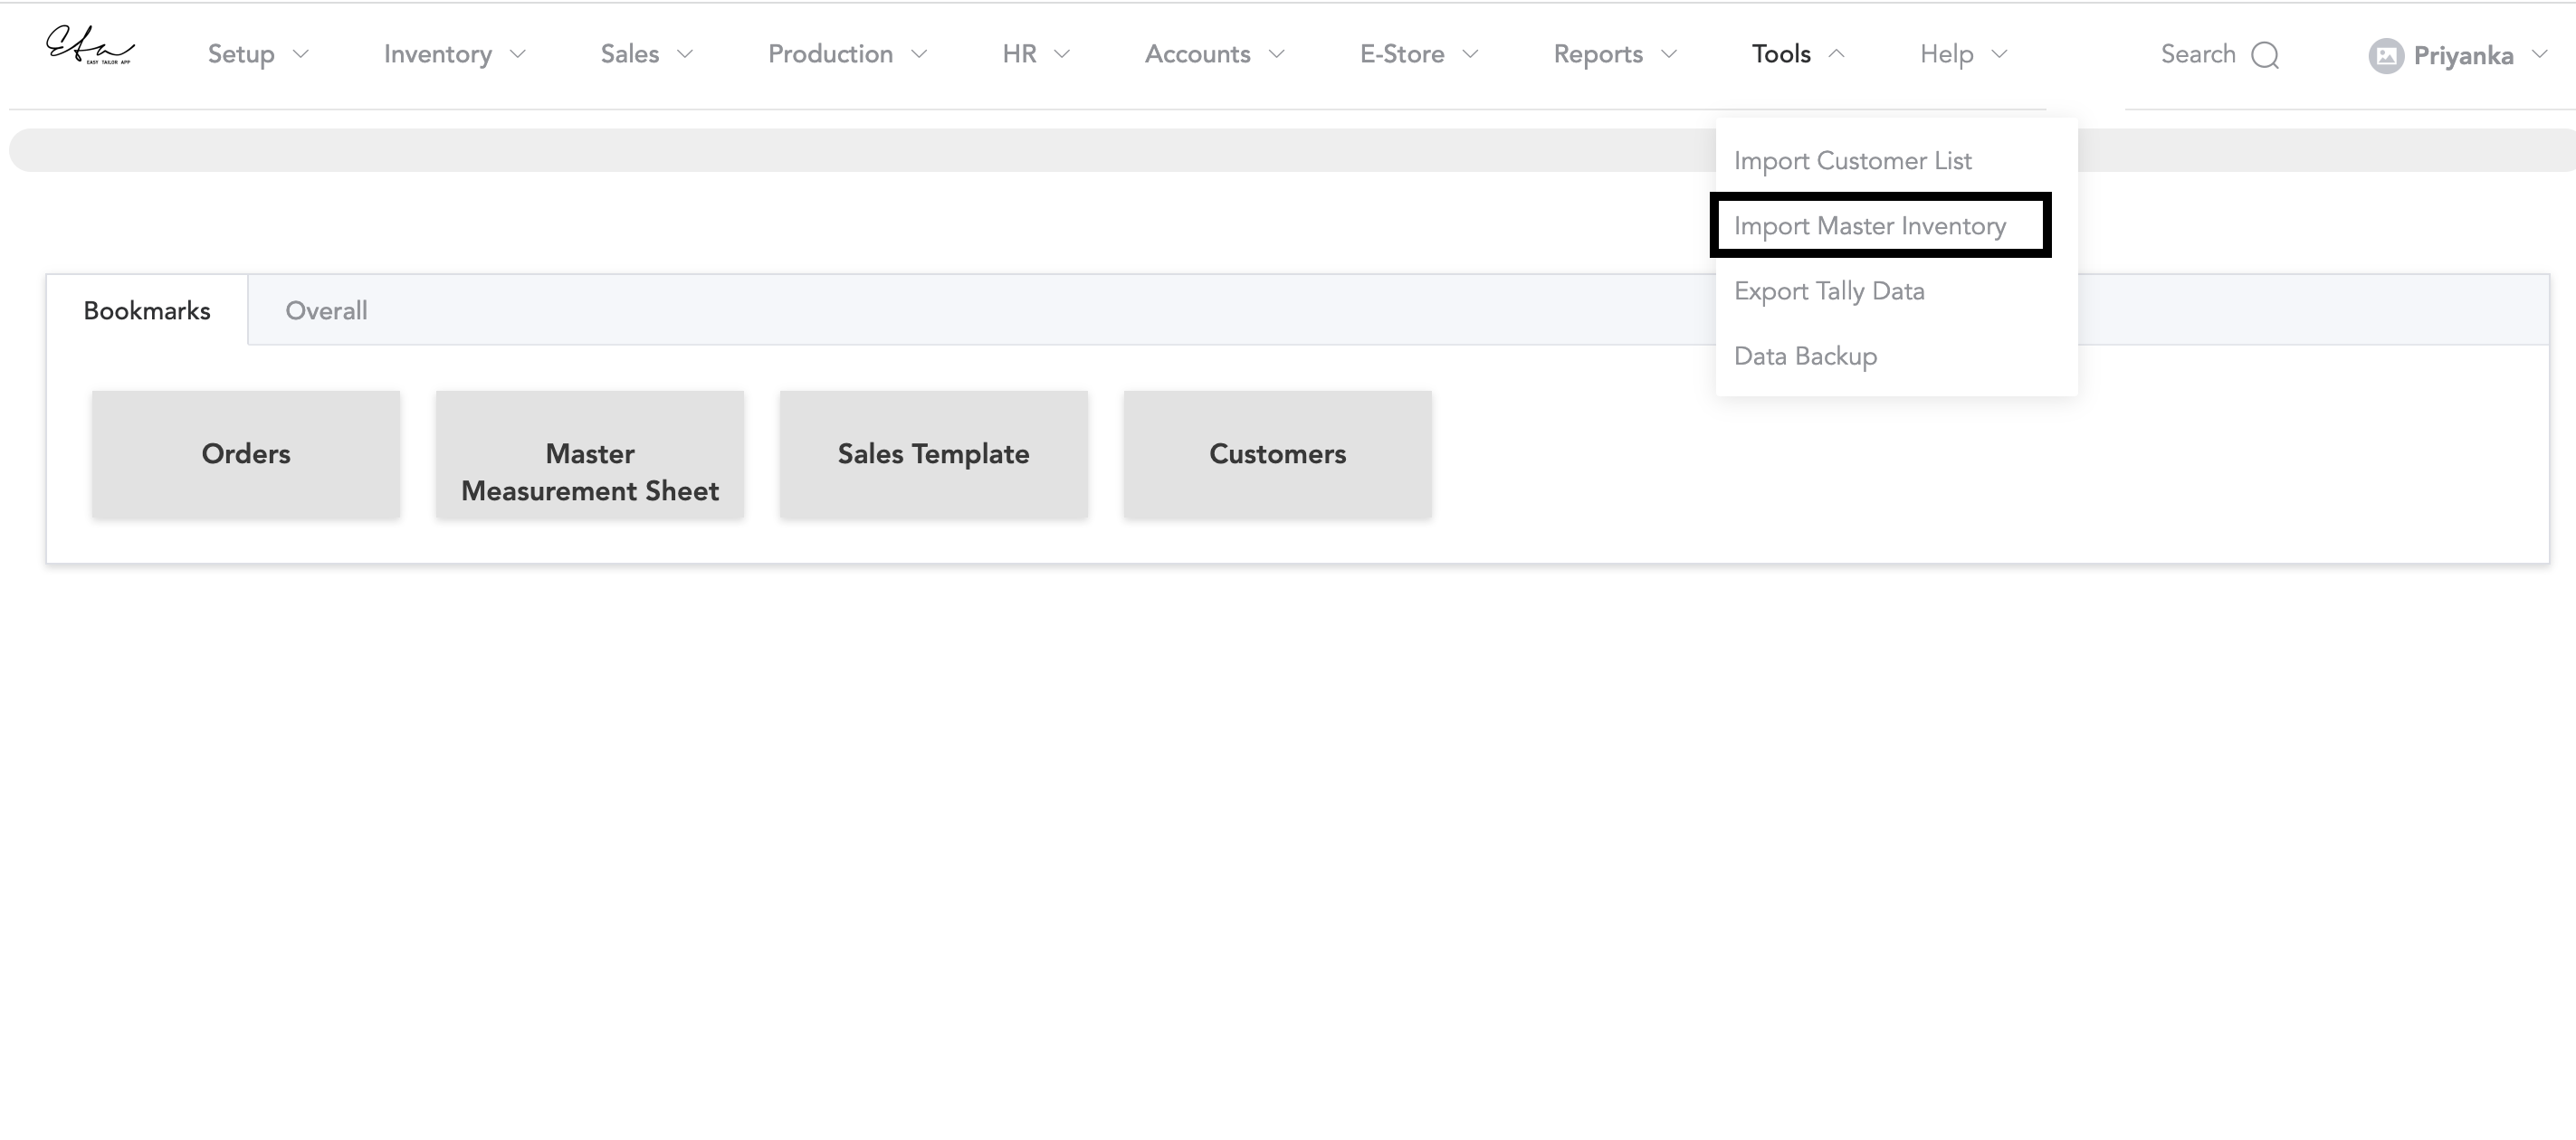
To upload the inventory sheet, go to the Tools menu and then Import Master Inventory

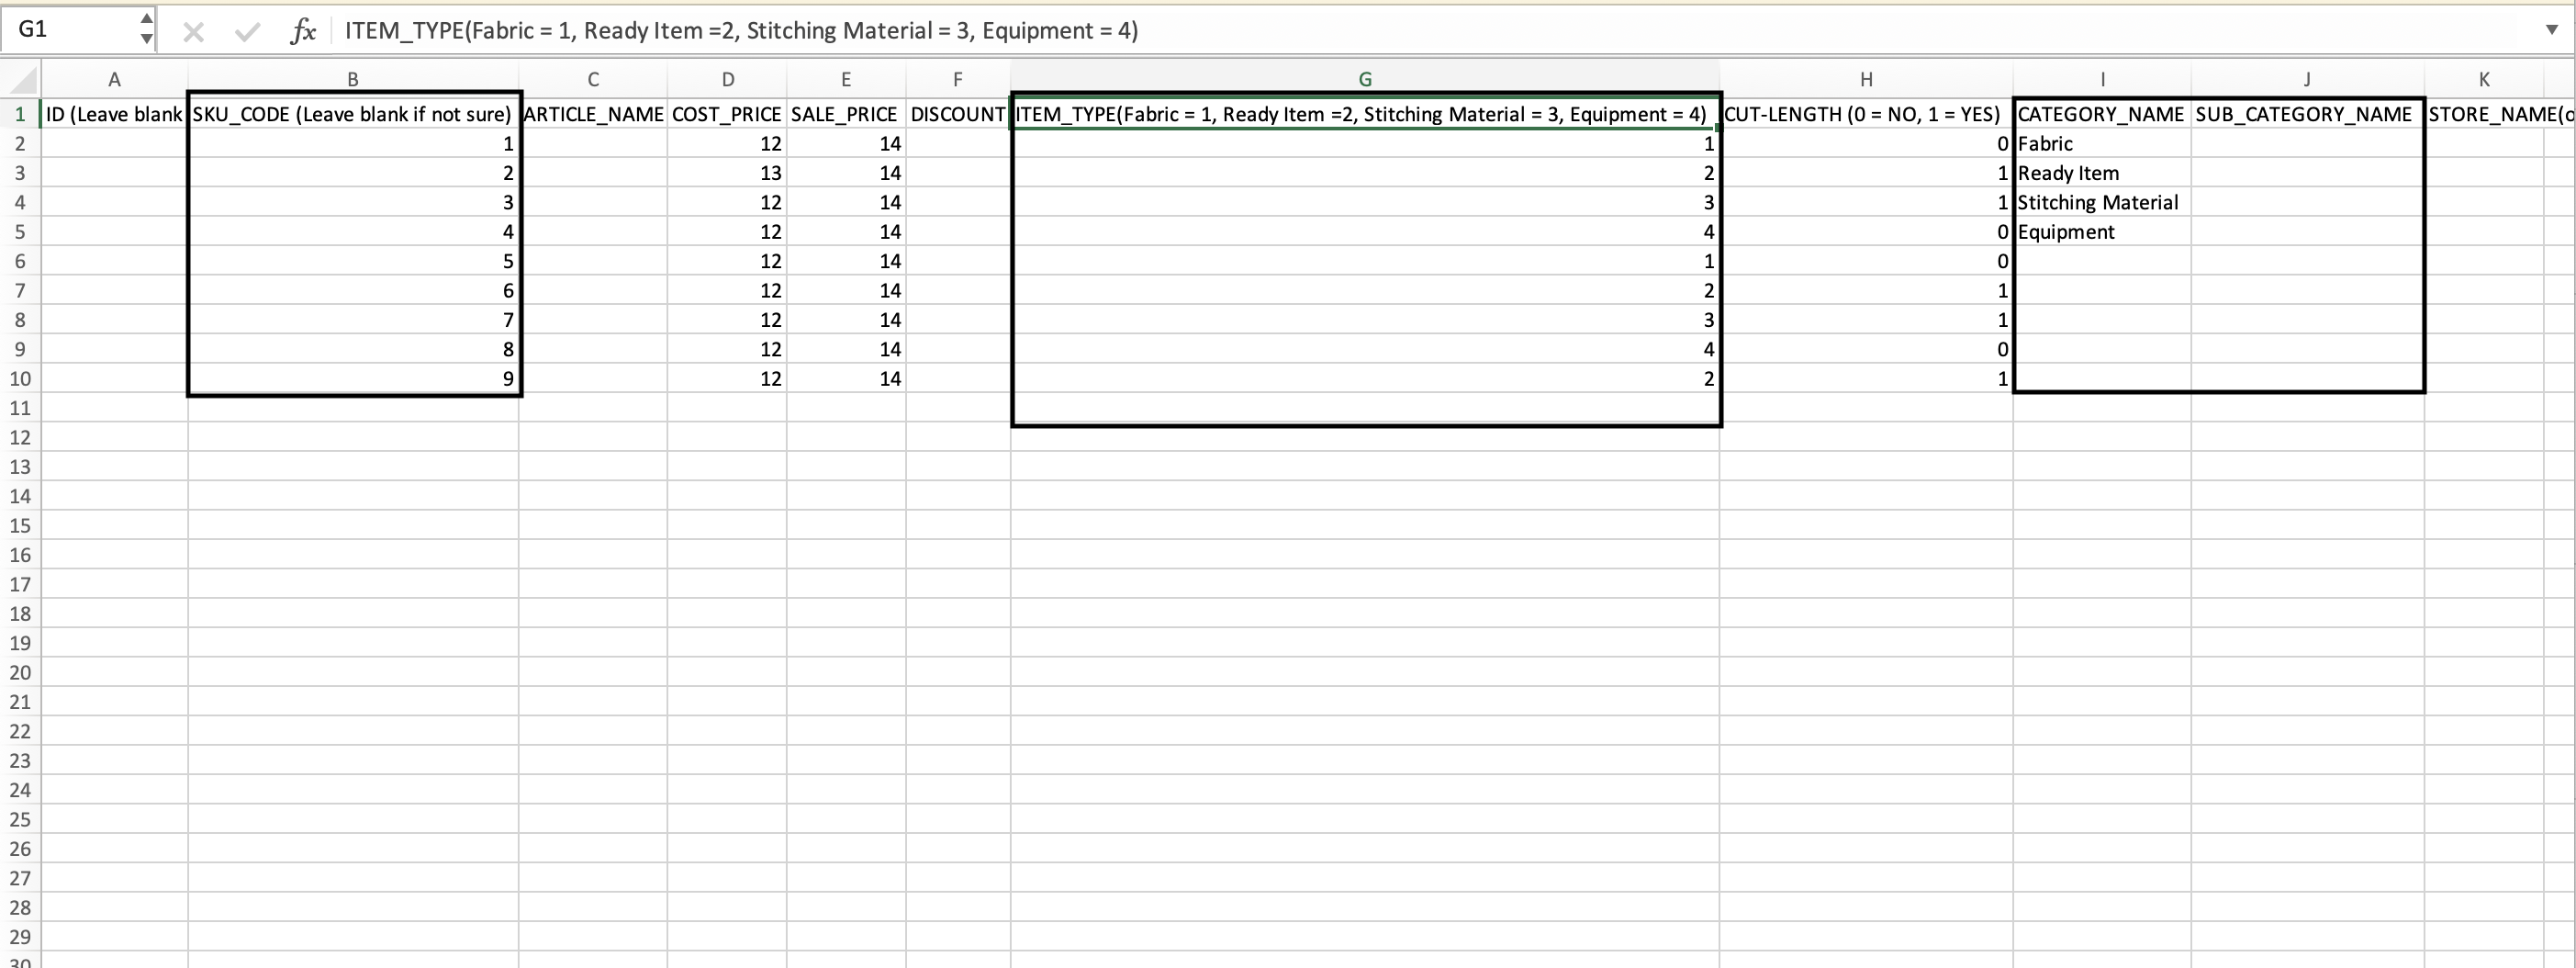
Then, you will be displayed with the choose file option, before you choose a file, you can download the sample file from the system and prepare your inventory sheet according to the sample file.

In the sample file, add the SKU Code and note that if you are adding new items, the SKU codes should be new and different. You may add other details. Another mandatory point is to add the Item Type, whether the item is fabric, ready item, stitching material or equipment. For fabric, add 1, for ready item, add 2, for stitching material it would be 3, and for equipment its 4. Then next is Category Name and Sub Category Name.
Remember that the category and sub-category of the inventory items that are added to the CSV list should be similar to the system inventory categories and sub-categories.
System inventory categories and sub-categories can be added in the setup->Inventory Setup->Fabric Categories (for fabrics)->Retail Categories (for ready-made items)->Raw-Material Categories (for stitching materials).
Once you have the sheet ready, you can upload the sheet.
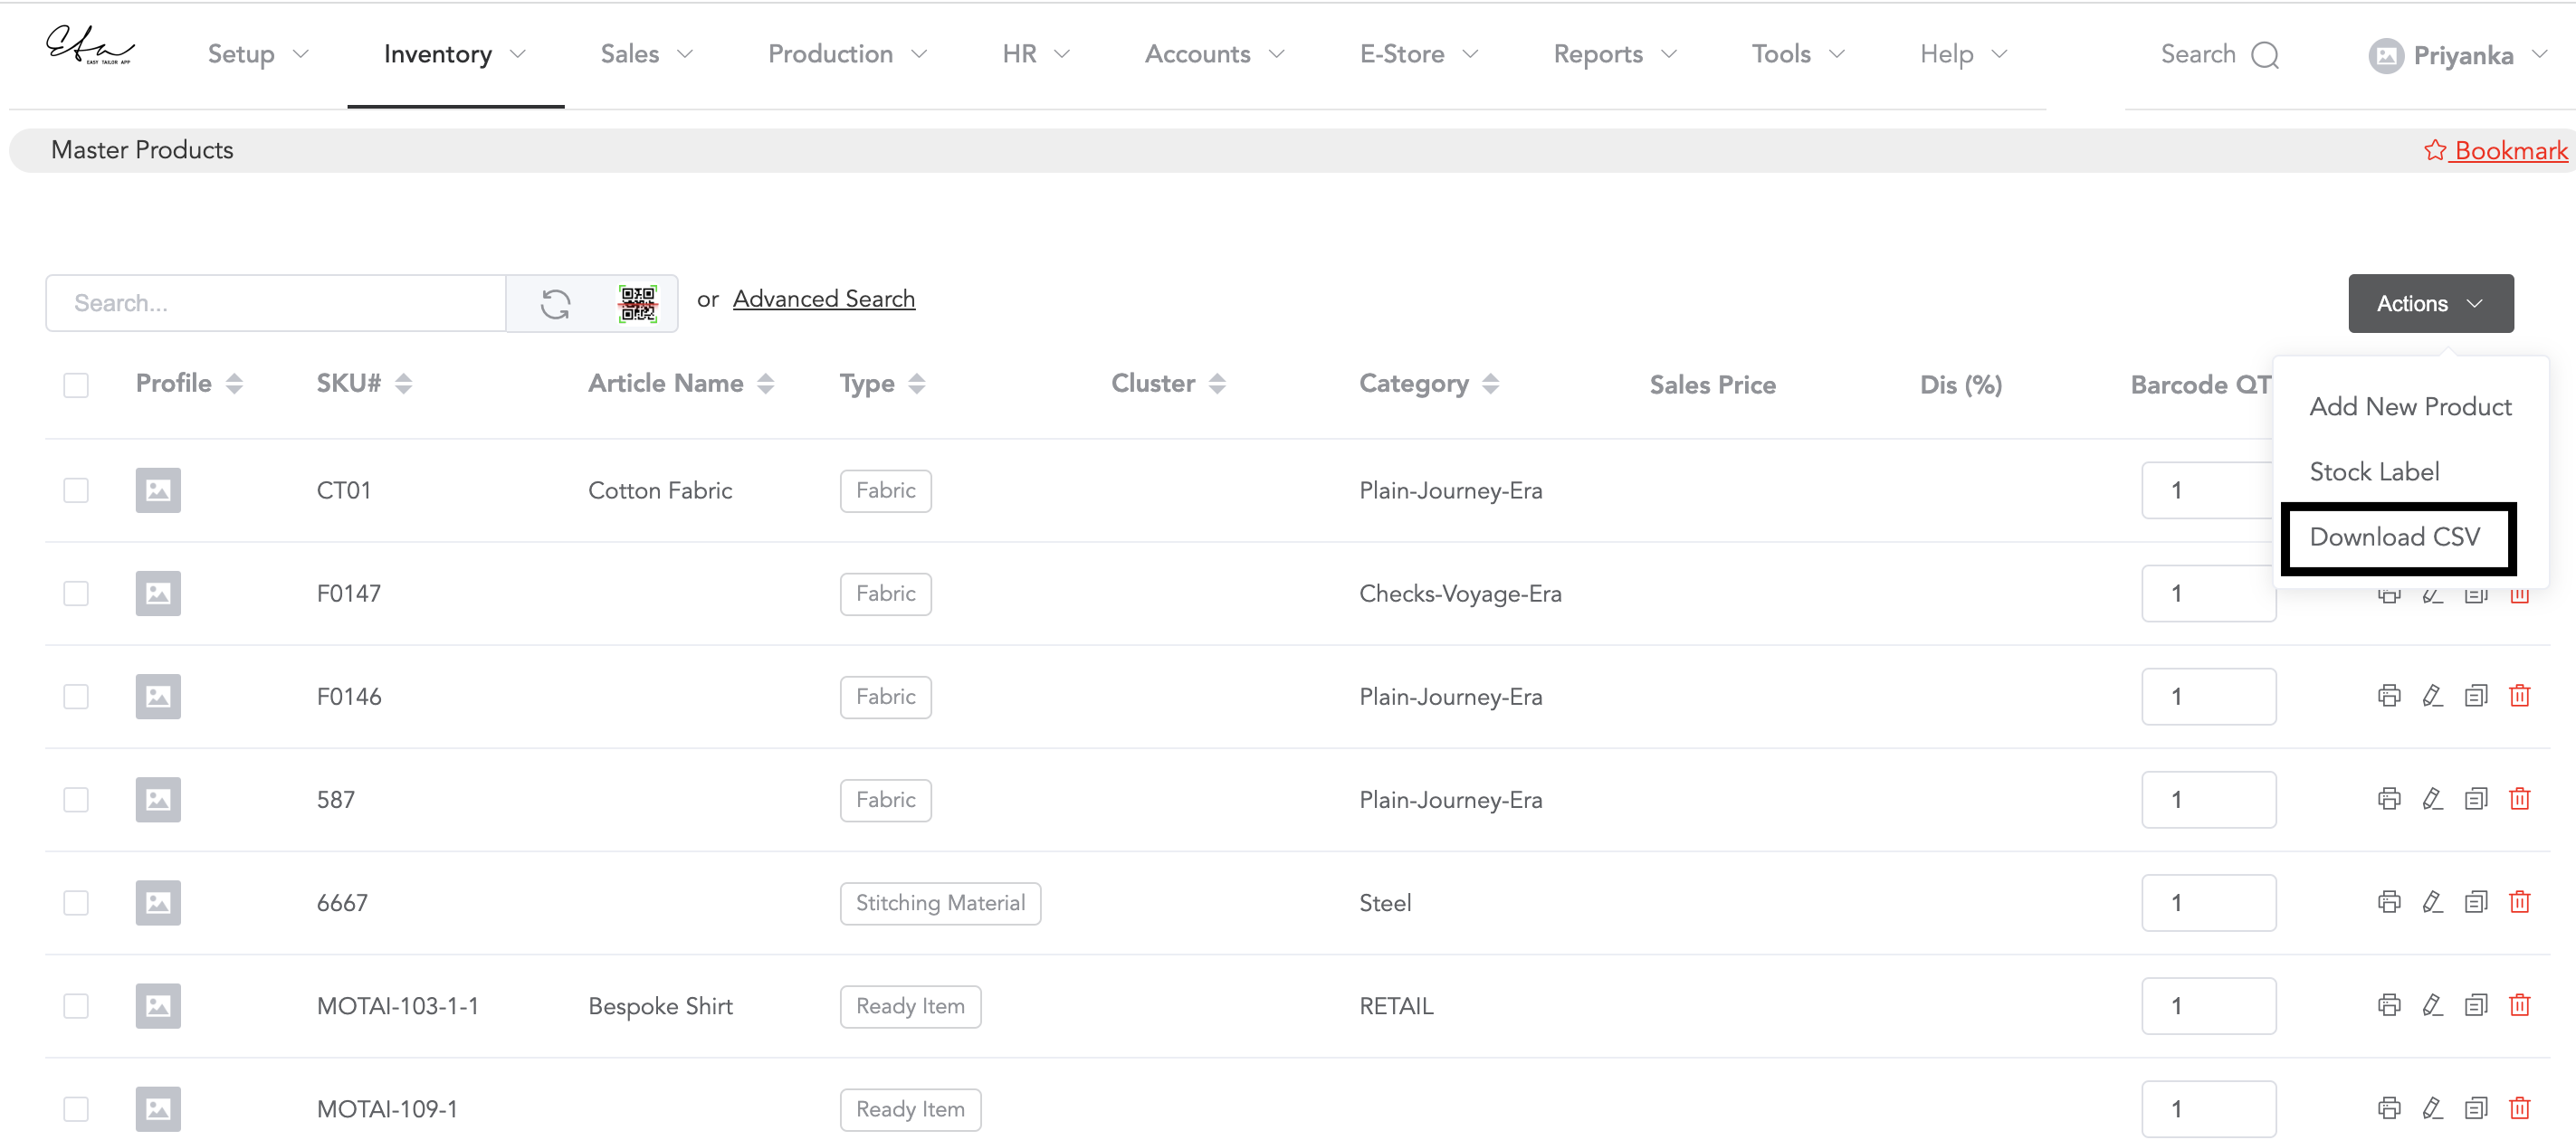
The above process is for the new inventory sheet upload. If you have existing inventory items in the system and you want to update the inventory, then you can go to Inventory and then Master Products and click on Actions.

Now, download the sheet, and after updating and making any changes in the inventory sheet, you can then upload the sheet from the tools section.