Delivery Receipts
After the garment completes all the production work stages, it will be ready for delivery. You can create delivery receipts to record sales deliveries.
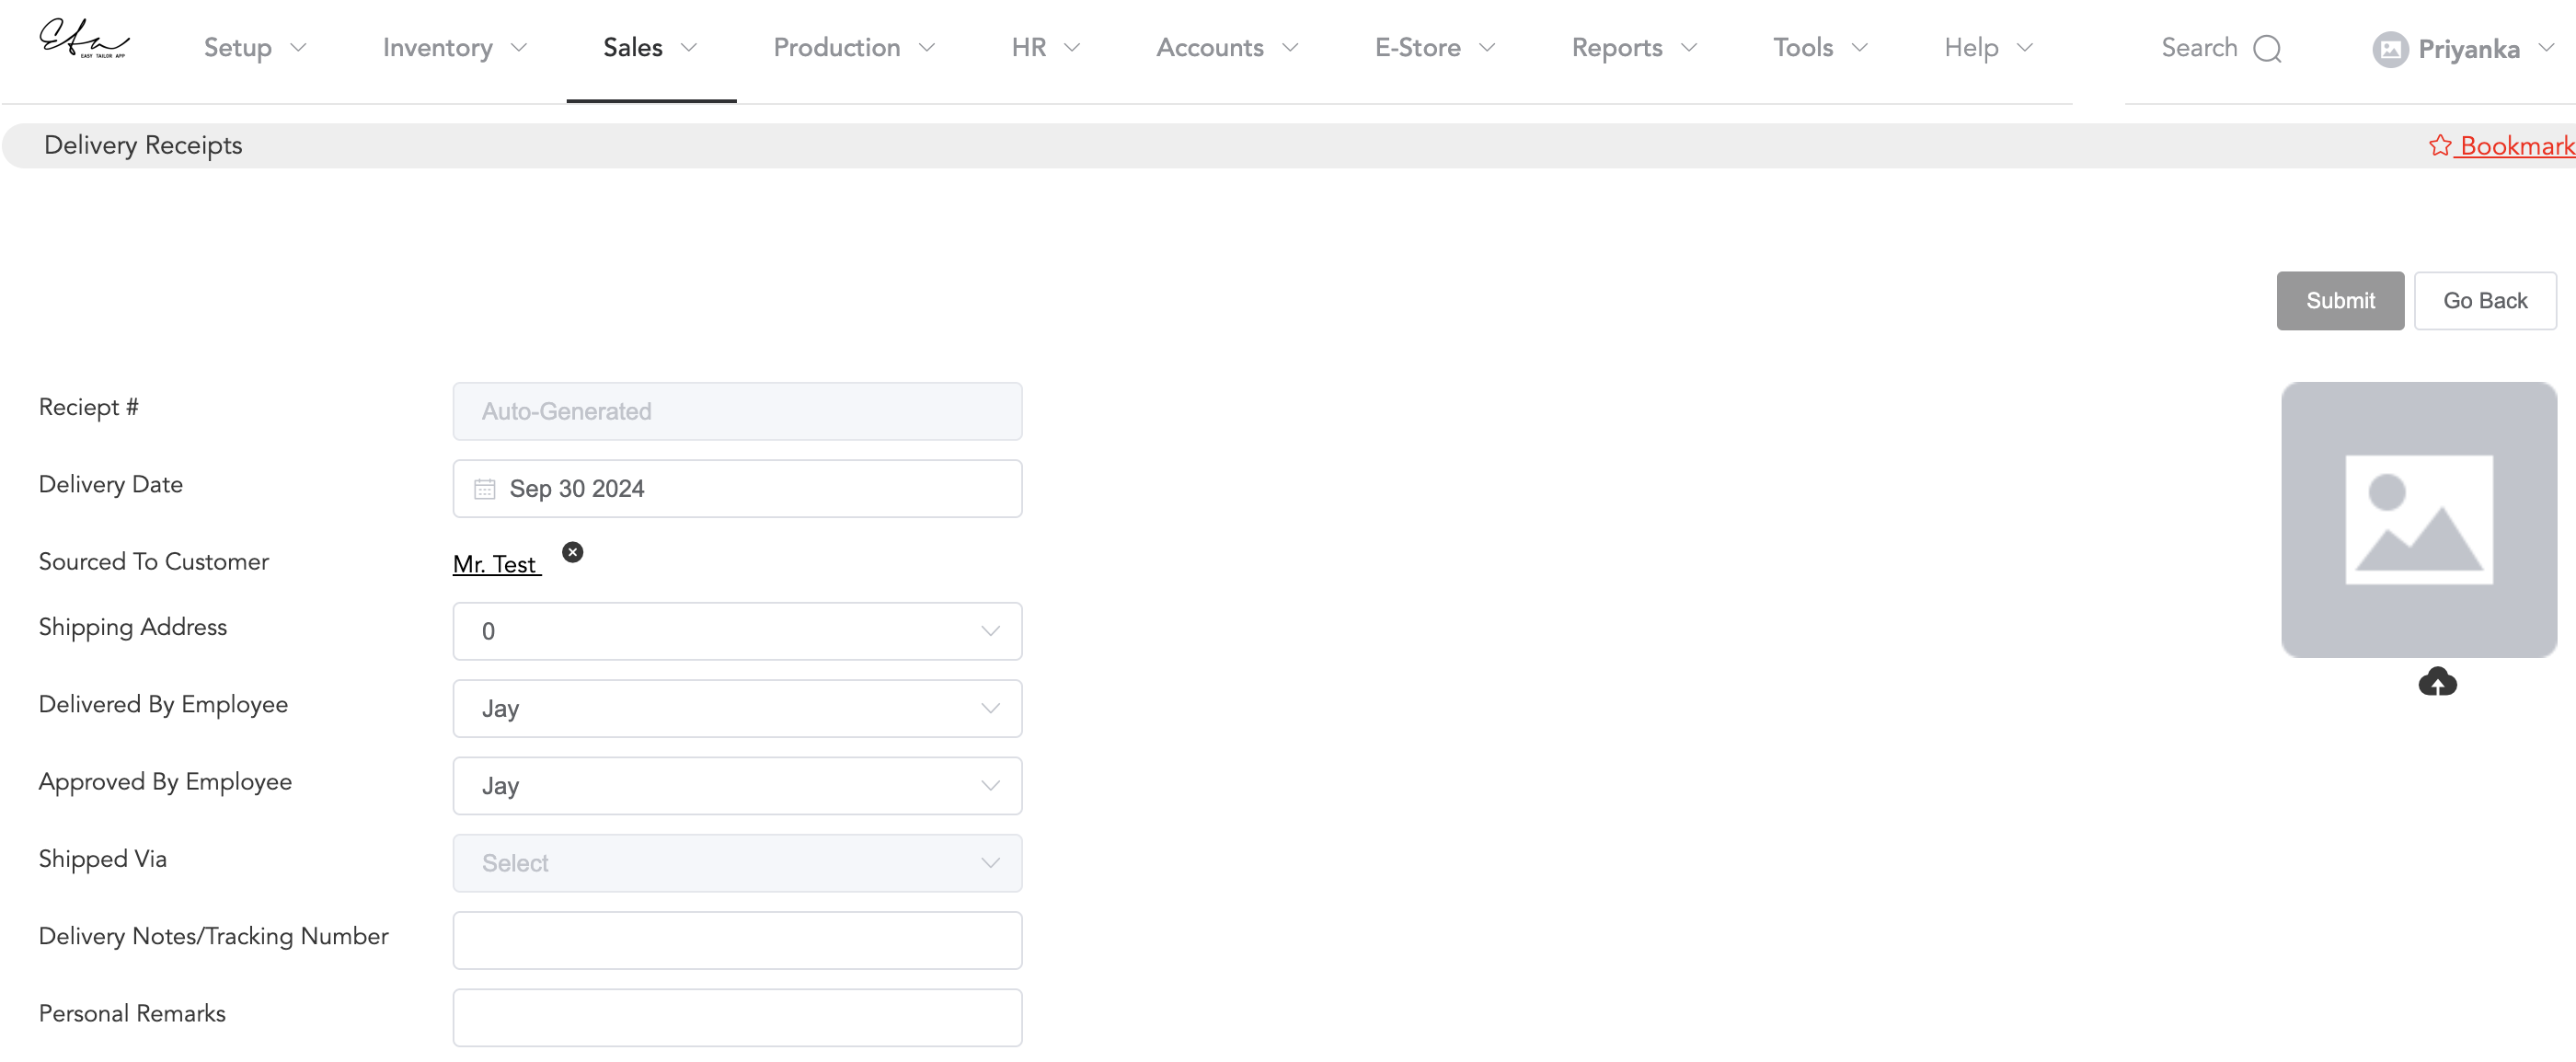
Go to Sales, then Delivery Receipt.


The receipt number is system-generated. Select the date, search, and enter the customer’s name, and choose shipping address, which is optional. Now select the employee who delivered the item and who approved it. If you have registered any shipping partners, then the shipping partner can be selected in the shipped via column. You can enter any delivery notes or tracking number and remarks.
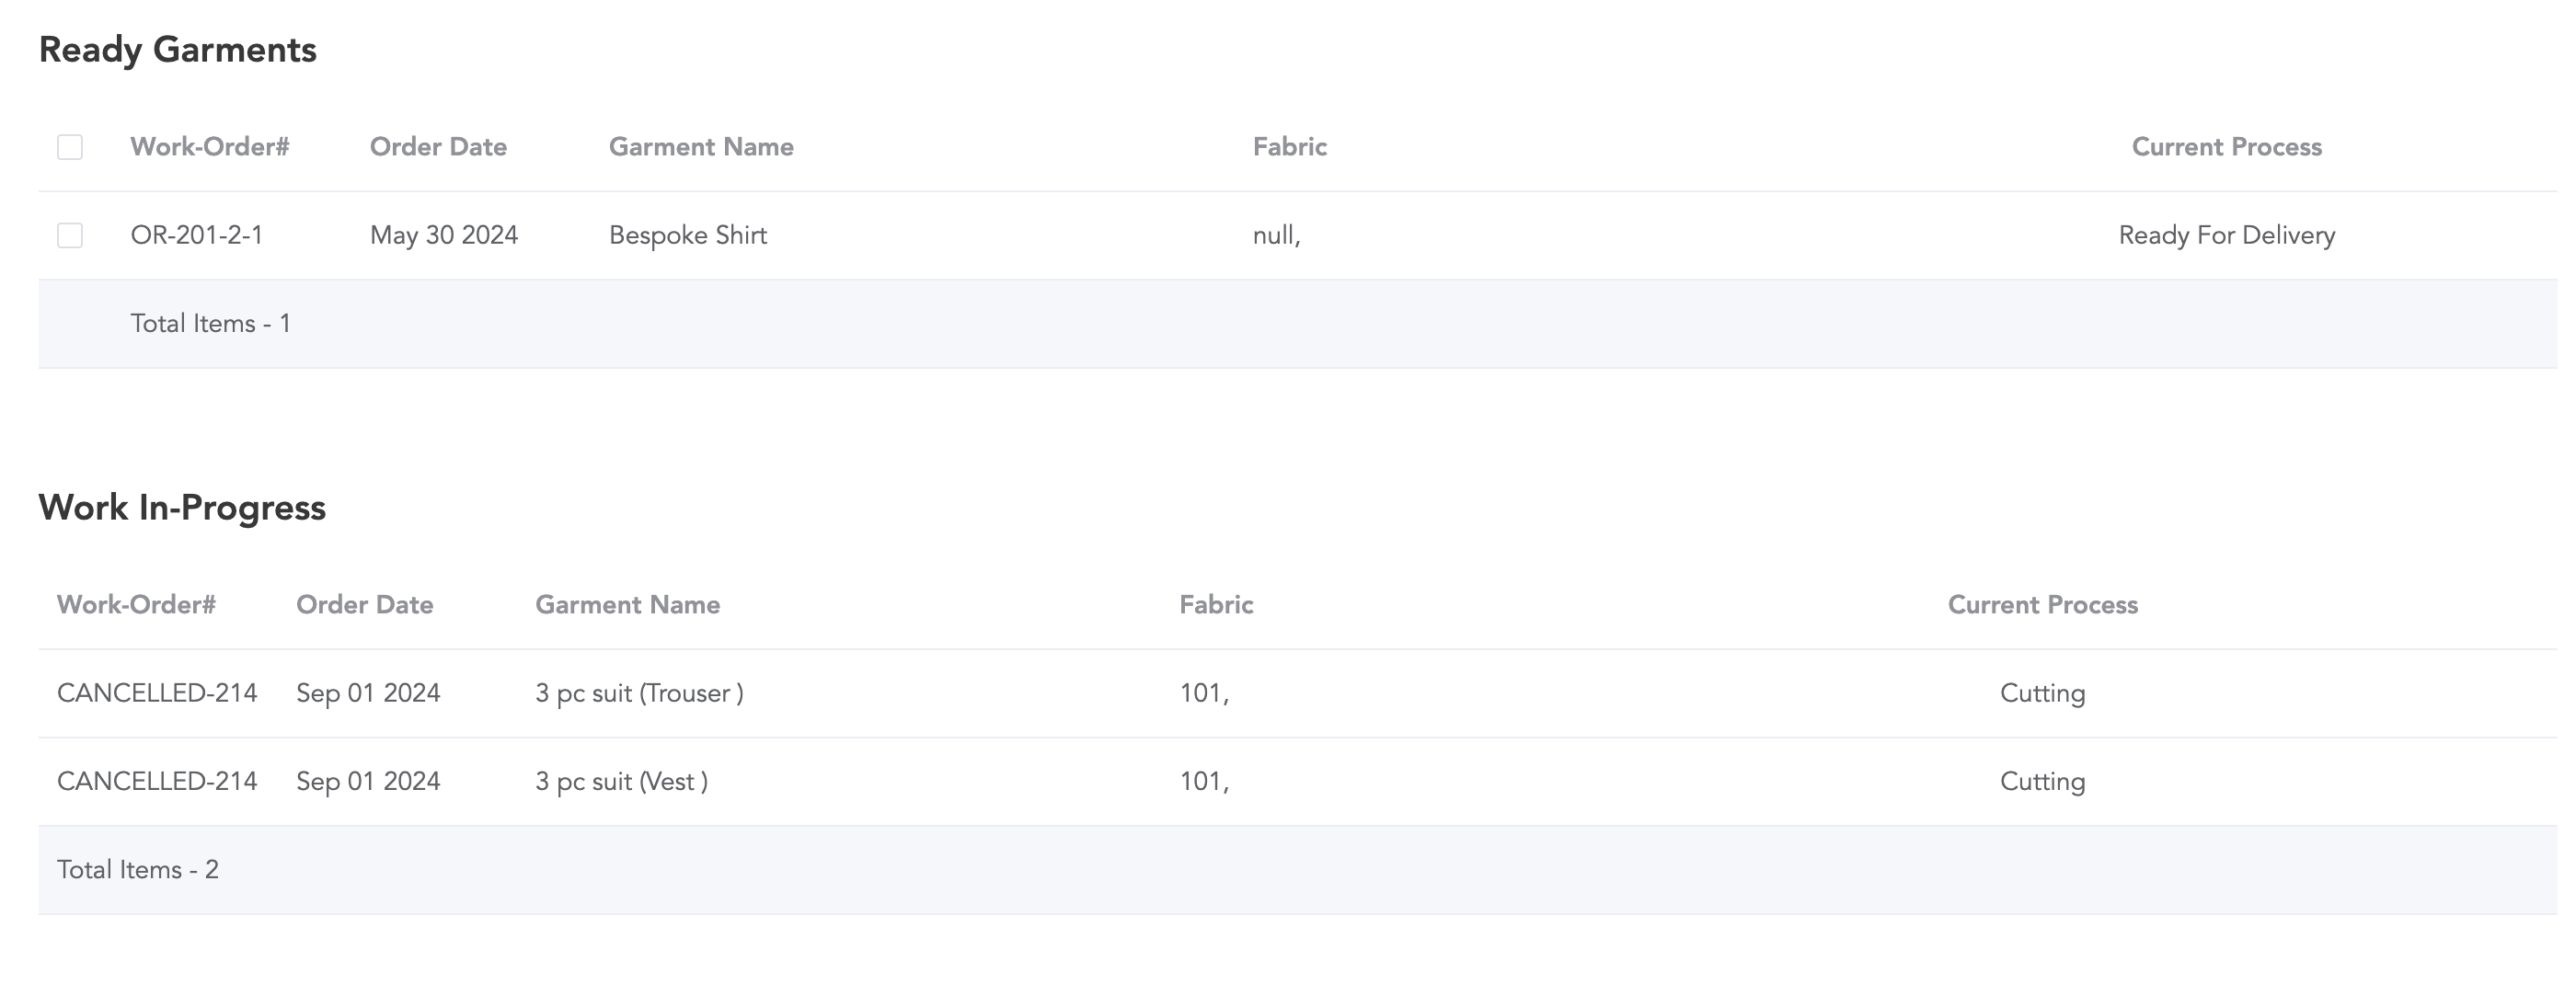
- As soon as you select the customer name and the employee who delivered it then the item list of the customer will appear in two sections. One is ready items and another is work-in-progress items.
- You can select the ready items and click the submit button to record the delivery receipt.
You can also upload any delivery-related image and then submit it.
- Another way to record the deliveries is: in the sales window edit an order and click on Misc. Actions and there you will find the option Deliver Tailoring/Retail Items. Click on that and it will take you to the delivery receipt page. There the customer name will be selected and you will only need to add other details and then submit.
After submitting the receipt, a print option will appear, and you can print the delivery receipt or send the delivery message via WhatsApp or Email.